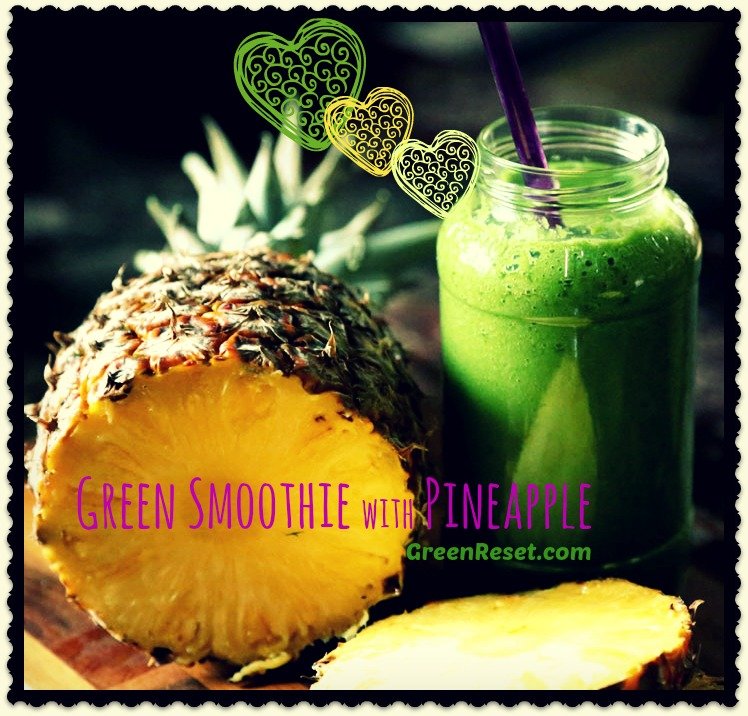
Pineapple smoothies are delicious, reminding me of hot summer days on a beach and ice-cold pina colada.
Unfortunately, many pineapple smoothie recipes available both online and in cookbooks call for some form of dairy, either yogurt, milk or cream. Fortunately, it’s easy to substitute, by using non-dairy milk, or simply adding very ripe banana and/or avocado to make the smoothie more creamy. (If you are wondering why, read this post and this post).
So today I have three pineapple recipes for you. One is a simple version of the classic, and two that are green pineapple smoothies. I call them green pina coladas.
Classic Pineapple Smoothie Recipe
1/4 fresh pineapple – peeled, cored and cubed
1 large ripe banana
1 cup non-dairy milk (such as almond, soy, etc.) or water
4 ice cubes (optional)
Green Pineapple Smoothie Recipe
As you already know I put greens practically into each recipe, as I don’t want to miss the opportunity to add more healthy nutrients to my drink. So this one is no different. All ingredients in this smoothie, from the bananas to the pineapple to the coconut to the greens provides a healthy source of vitamins and minerals that come together in a smoothie that is as good for you as it tastes.
Green Piña Colada Pineapple Smoothie
Ingredients
- a 13.5-oz can of coconut milk
- 1 banana
- 4 cups fresh pineapple cut into pieces or frozen pineapple chunks (unsweetened)
- 1/2 bunch of spinach, kale or collard greens, stems removed (4-5 large leaves)
- a few pieces of ice, if you want it chilled
-
-
Instructions
- Blend all ingredients in your blender, beginning with the lowest speed setting and work your way up to the highest setting until the smoothie is creamy. Add more liquid or ice if the mixture is too thick and blend until desired consistency is achieved. Pour into a tall glass, sip and smile!
3.1
https://greenreset.com/pineapple-smoothie/
Pineapple-Strawberry Smoothie Recipe That Will Make You Smile!
Ingredients
Instructions
- Blend everything on high. A high power blender is best to blend tough greens, such as kale or collard greens (I use Vitamix).
- Add more water if needed to get things moving around in the blender.
- Pour into a pretty glass, drink, and smile!
3.1
https://greenreset.com/pineapple-smoothie/
Benefits of Pineapples
Pineapples are delicious (provided that they are ripe), so you don’t need encouragement to eat them, but here are some of the health benefits:
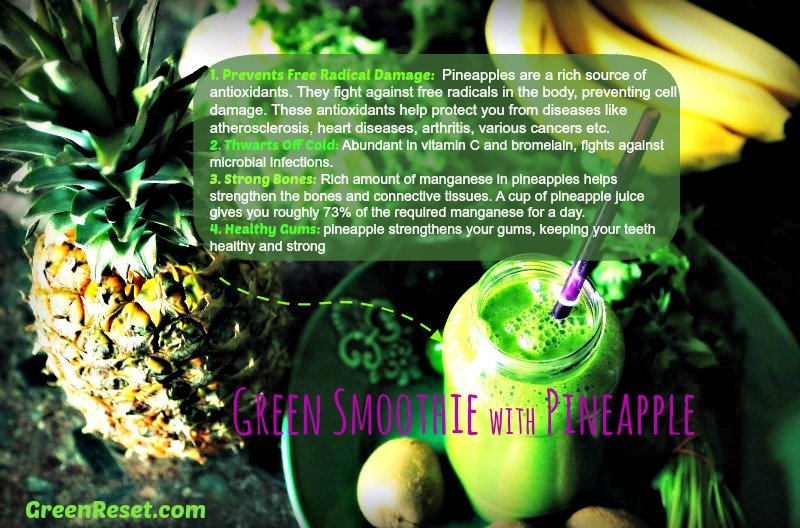
1. Prevents Free Radical Damage: Pineapples are a rich source of antioxidants. They fight against free radicals in the body, preventing cell damage. These antioxidants help protect you from diseases like atherosclerosis, heart diseases, arthritis, various cancers etc.
2. Thwarts Off Cold: Abundant in vitamin C and bromelain, fights against microbial infections.
3. Help Strengthen Bones: Rich amount of manganese present in pineapples helps in strengthening bones and connective tissues. A cup of pineapple juice gives you roughly 73% of the required manganese for a day.
4. Healthy Gums: Eating pineapple strengthens your gums, keeping your teeth healthy and strong.
5. Help Prevent Cancer: The abundance of antioxidants in pineapples helps fight against free radicals, halting the process of cell damage, preventing cancers.
6. Boost Heart Health: Powerful antioxidants keep free radicals away and lower the cholesterol levels, preventing heart diseases.
7. Boost Immunity: Rich content of vitamin C in pineapples boost your immune system by its strong antioxidant effect.
…and more…
How to Fix A Green Smoothie That You Don’t Love
It happens rarely, but it does happen. You made a smoothie that you don’t really care for. Don’t despair! The advantage of smoothies over other types of recipes, such as baking, is that they can be easily fixed.
- “My smoothie is too thick“: Add more liquid. The best liquid for smoothies is water, but any non-dairy milk or fresh juice can be used as well.
- “My smoothie is too watery”: Add more fruits and veggies. Bananas and avocados are great for making thick smoothies that are nice and creamy.
- “My smoothie is too savory“: Add more sweet fruits. Add a packet of stevia, 1-2 tablespoons agave syrup, or other sweetener. A few dates or other dried fruit will also work, but you’ll have to blend it really well.
- “My smoothie is too sweet“: Squeeze some lemon or lime juice into your smoothie. Add more greens and/or celery. Add a tart apple and blend well.
- “My smoothie tastes bland”: Perhaps you added too many ingredients that don’t complement each other, or not enough ingredients that have distinct taste. Whatever the reason, I find that adding spices, such as cinnamon, vanilla, a piece fresh ginger, a piece of lemon (or some lemon juice), or a few fresh mint leaves will add some instant zing to any smoothie that is too bland.
- “My smoothie is too “green” tasting“: Some greens have very distinct flavor. If you added too much strong tasting greens, such as mustard greens or dandelion, and the taste is too strong, you will have to dilute the smoothie by adding more fruits, mild greens and some condiments, such as ginger or lemon.
- “My smoothie has awful color, my child (spouse, etc.) refuses to drink it“. Best way to mask the color is to add some frozen blueberries or cocoa powder to the mix. Another way is to serve it in a non-transparent container with a straw.
Questions? Comments? Suggestions?
If you have a favorite recipe, why not submit it here in the comment section of this smoothie recipes blog for others to enjoy too!
I also welcome any comments, questions and suggestions. Thanks!
Even though I’ve known about the nutritional benefits of sprouting for quite some time, I’ve only recently started experimenting with growing my own sprouts and adding them to green smoothie recipes and other dishes. So, from now on, I’m determined to not just include more sprouts in my diet, but to learn how to grow them, and start a mini-sprout garden in my kitchen.
Really, when you think about it, it’s probably the most local, freshest, most nutritious food that you can get, especially in the winter. And even in other times of the year – not everyone has a garden – but you can have sprouts growing in your kitchen all year long.
Plus, sprouts are considered a SUPER FOOD – they are probably the most nutrient dense of all foods, while being incredibly affordable and easy to grow.
Sprouts can provide you with a steady year-round source of vitamins, minerals, trace minerals, enzymes, antioxidants, chlorophyll and protein, as well as a high concentration of health and youth-supporting enzymes.
To boot, they are low calorie and contain little or no fat. The fat they do contain is the healthy fat that your body needs. As some of the most nutritious foods that exist, they make a great addition to any healthy eating plan.
You can have them fresh all year round, even when fresh vegetables are hard to find. It’s easier than planting a garden outside and they’re ready much quicker. And the best part is that you can grow fresh sprouts right in the comfort of your own kitchen. It takes less than 2 minutes a day and they are ready in 3 to 7 days, depending on the variety. You can sprout seeds, beans, grains and nuts. Some of the most popular varieties are alfalfa, broccoli, red clover, radish, mung beans, lentils, garbanzo beans and peas.
So What Are the Health Benefits of Sprouts?
The essential requirement for health and healthy weight loss is a diet that is high in nutrients and low in calories.
Doctor Fuhrman calls it a Nutritarian diet. (You shouldn’t really be thinking of it as a diet in a sense that you do it for a few weeks and then go back to your old ways. It should become your lifestyle.)
Problem is many of the foods we buy at the supermarkets today are not as fresh and nutrient rich as we believe. Many items have to travel across the country (or across the world) to get to where we live. They have to be treated with various life-extending substances and procedures.
And buying supplements can get very costly.
Obviously the best solution would be to grow your own food, but that’s not for everyone…
Sprouting is something that anyone can do that is easy to do and will provide tremendous benefits to your health, helping you lose weight, reverse disease, increase energy, or whatever your goal.
Apparently, sprouting magnifies the nutritional value of the seed and makes the nutrition more bio-available to the body. It boosts the B-vitamin content, triples the amount of vitamin A and increases vitamin C by a factor of 5 to 6 times. Starches are converted to simple sugars, making sprouts very easily digestible.
Have you heard about the Hippocrates diet? In the renowned Hippocrates Institute, where they regularly cure terminally ill people using only nutrition and other lifestyle modifications, sprouts are one of the key ingredients on their menu.
Sprout Smoothie Recipe
Sprouts are really versatile. You can use them in smoothies, blended soups and salads, as well as regular salads, on sandwiches, stir fried with vegetables, or enjoy these nutrient-packed delicacies as a snack all by themselves or added as a garnish to a main dish.
To make a smoothie, add about 1/4 to 1/2 cup of sprouts to any smoothie recipe. Don’t put too many sprouts in your smoothie, and it will take on an overwhelmingly grassy flavor. Used in moderation, however, and sprouts are an absolute delight.
You can grown them yourself (see the instructions below), or simply buy them in a grocery store (that’s what I did for this recipe). If you don’t like the effort that growing your own sprouts takes, many health stores and farmers market have sprouts – but the selection may not be impressive and it will cost much more than if you grown them yourself.
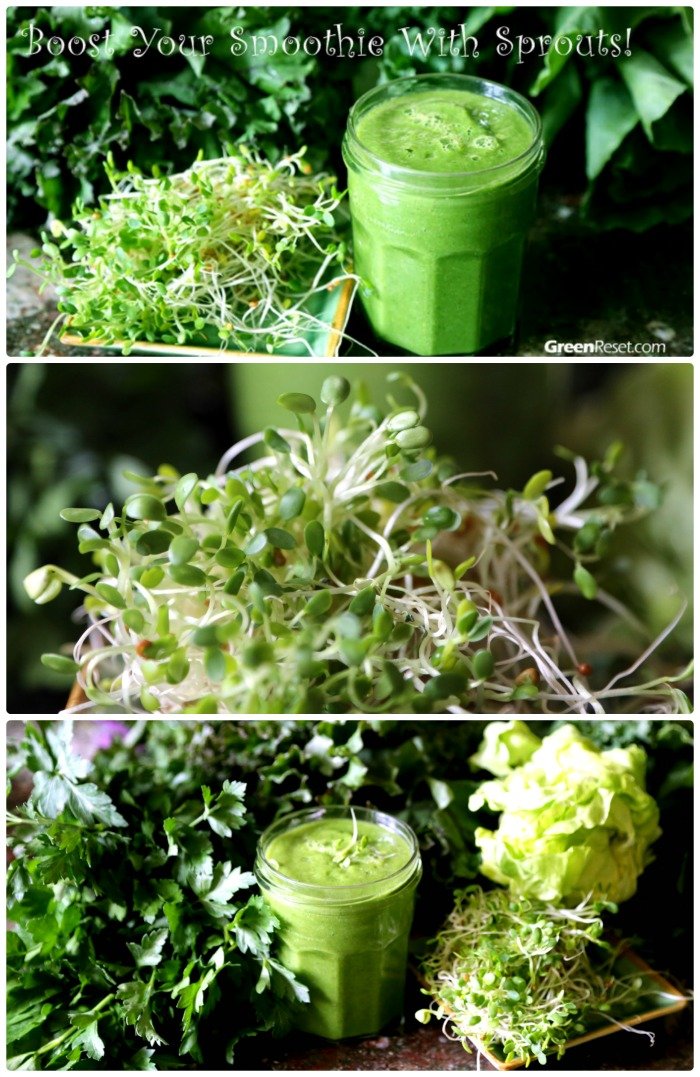
Green Smoothie with Sprouts
Ingredients
- 1/4 cup alfalfa sprouts
- 1 cup baby spinach
- 1 cup pineapple, frozen
- 1/2 banana, frozen
- 1 cup water
- 1/4″ – 1/2″ fresh ginger, minced
- 1/16 teaspoon of Stevia (or agave nectar)
- 1-2 ice cubes, to thicken
Instructions
- Blend ingredients in a powerful blender until smooth and creamy. Thin with water or thicken with ice if desired. Enjoy!
How to Grow Your Own Sprouts
Sprouts are easy to grow and take a minimum of effort. You probably already have everything you need to start your own kitchen garden. Once you’ve gone through the process once or twice, it will become easy.
To grow sprouts in jars on your kitchen sink, you will need:
- a wide-mouth jar
- screen or netting
- a rubber band
- a bowl to drain the jar
- fresh water
- sprouting seeds
Choose organic sprouting seeds whenever possible. The problem is that seeds that are not specifically sprouting seeds and not organic may be chemically treated with pesticides.
You’ll find lots of sprouting supplies and books on Amazon.
Two ounces of seeds will yield 1-2 pounds of sprouts, and 8 ounces of beans will yield 1 pound of sprouts.
Your sprouts will grow best when the temperature is between 65F and 75F (18C and 25C).
- Put 1 to 2 tablespoons of seeds or 3 to 4 tablespoons of beans in a wide mouth jar.
- Cover with netting or cheesecloth and secure with a rubber band.
- Rinse a couple times, then fill the jar 3/4 full with pure water, room temperature, and soak 6-8 hours or overnight.
- Drain soak water. Rinse 2 or 3 times in cool water.
- Invert jar and prop at angle in sink or bowl to drain.
- Rinse 2 or 3 times twice a day in cool water.
- Place sprouting jar in bright light, but not direct sunlight, last sprouting day to allow chlorophyll to form.
- Sprouts will grow three to seven days. Seed sprouts, like alfalfa or red clover are 1″ (2.5 cm) to 2″ (5 cm) long when ready. Bean sprouts, like lentils or peas are 1/4″ (.5 cm) to 1/2″ (1 cm) long when ready. These are more tender when small. Mung beans are 1″ (2.5 cm) to 2″ (5 cm) long when ready. They are best grown in the dark to prevent bitterness. They should be rinsed 3-4 times a day. Taste the sprouts as they are growing to see when you like them best.
- Drain well. Cover the jar with a lid, or transfer to a covered container. Refrigerate to store.
Soaking times and amounts of seeds for sprouting in a quart jar:
- Alfalfa seeds: 4 to 8 hours
- Clover seeds: 4 to 8 hours
- Broccoli seeds: 8 to 12 hours
- Whole lentils: 8 to 12 hours, then eat
- Fenugreek seeds: 4 to 8 hours
- Radish seeds: 4 to 8 hours
- Raw hulled sunflower seeds: 6 to 8 hours, then eat
- Chia seeds: 6 to 8 hours, then eat
- Sesame seeds: 6 to 8 hours, then eat
- Wheat berries: 8 to 12 hours
- Rye berries: 8 to 12 hours
More Great Ways to User Sprouts
Once you get your sprout garden going, you can use the sprouts in a variety of ways, not just in smoothies.
- Add to tossed salads
- Use in coleslaw (cabbage, clover, radish)
- Add to potato salad (mung bean, lentil)
- Use in wraps and roll-ups (alfalfa, sunflower, radish)
- Stir-fry with other vegetables (alfalfa, clover, radish, mung bean, lentil)
- Replace celery in sandwich spreads (lentil, radish)
- Grind up and use in sandwich spreads (lentil, radish)
- Stir into soups or stews when serving (mung bean, lentil)
- Mix into pancake or waffle batter (buckwheat)
- Eat them fresh and uncooked in a sprout salad (salad mixes)
- Combine in rice dishes (fenugreek, lentil, mung bean)
- Add to vegetable sushi (radish, sunflower)
- Saute with onions (mung bean, clover, radish)
- Puree with peas or beans (mung bean, lentil)
- Add to baked beans (lentil)
- Steam and serve with butter (mung bean, lentil)
- Use in sandwiches instead of lettuce (alfalfa, clover, radish)
P.S. There have been some articles in the press about sprouts not being a safe food to eat. Read my article about the safety of sprouts.
Questions? Comments? Suggestions?
If you have a favorite recipe, why not submit it here in the comment section of this smoothie recipes blog for others to enjoy too!
I also welcome any comments, questions and suggestions. Thanks!
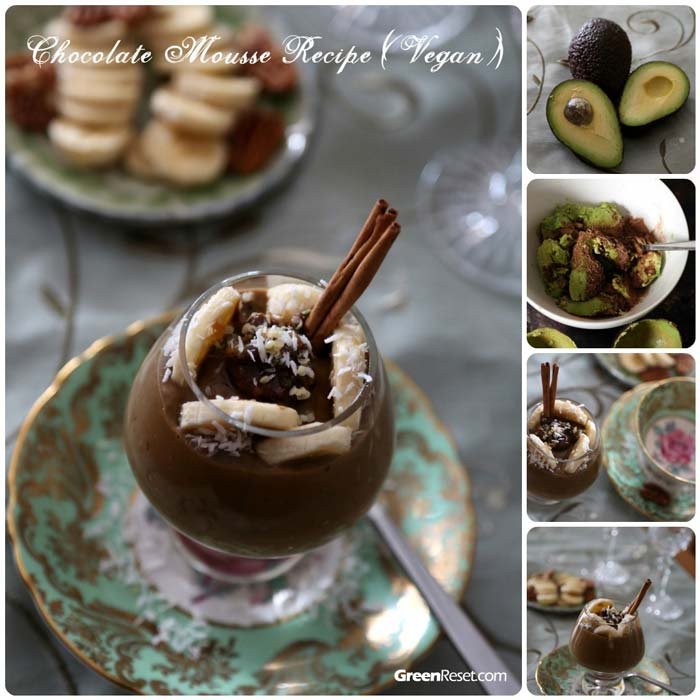
Chocolate mousse is a great dessert that doesn’t take a long time to prepare (this version, literally takes less than 5 minutes). Plus it’s great for entertaining because 1) it looks pretty, 2) it’s delicious, and 3) you can make it ahead of time.
The recipe that I’m about to share with you has to be one of the easiest and most satisfying desserts around.
How to make the easiest ever chocolate mousse
This Creamy Chocolate Avocado Mousse is rich and decadent. Silky texture and deep chocolate flavor in every spoonful. And you won’t believe how easy it is to make, with just two base ingredients, plus a few optional to be added as you wish.
Now, when most people think of avocado, a sweet desert will most likely be the last dish to spring to my mind.
So, if you are skeptical about putting avocados and chocolate together, it’s understandable. However, no worries! One spoonful and you will understand why many people rave about chocolate avocado mousse recipes.
When I made this recipe and dressed it up for the picture, my son wanted to try it immediately. After he did, he said: “You made this? You should be working in a restaurant!” :-).

As I said, avocado-based mousse is guilt-free because because it only contains healthy ingredients.
However, it doesn’t mean it’s calorie-free or fat-free, since avocados are quite high in calories and fat (I said guilt-free, not calorie-free ;-)).
Easiest Ever Chocolate Mousse Recipe
Easiest Ever Chocolate Mousse
Ingredients
- 1 large avocado (3/4 - 1 cup mashed)
- 1/4 - 1/3 cup vegan hot cocoa mix (sweetened)
-
Optionally add:
- a pinch of salt
- a few drops of vanilla extract
-
You may keep it super simple and just serve the mousse as is. Or build a mousse parfait!
Here are your optional ingredients:
-
- dark chocolate chips or chocolate shavings
- shredded coconut
- pecans, walnuts, or other nuts, chopped or whole
- freshly grated orange zest
- cinnamon or nutmeg
- sliced banana
- sliced strawberries
- whole blueberries or other berries
- crushed vegan cookies or grahams
- brown sugar
- drizzle of agave or maple syrup
- cashew cream, soy or coconut whip on top
Instructions
- Mash up avocado with hot cocoa mix. Process in a food processor until smooth with a pinch of salt and a few drops of vanilla.
- Serve in pretty glass containers decorated with slices of banana, chocolate chips, coconut flakes, or whatever else you have in your pantry!
3.1
https://greenreset.com/chocolate-mousse/

I hope you enjoy it as much as we did!
Try it on Sunday, Monday, Thursday or Friday :-). (Or any other day, really). It’s completely up to you!
Now, there are people who insist that avocados have no place in the dessert; they claim that they can still taste it no matter how much chocolate and other ingredients they add, and that this is not acceptable. If that’s you, I have another version of chocolate mousse recipe, with another surprise ingredient….
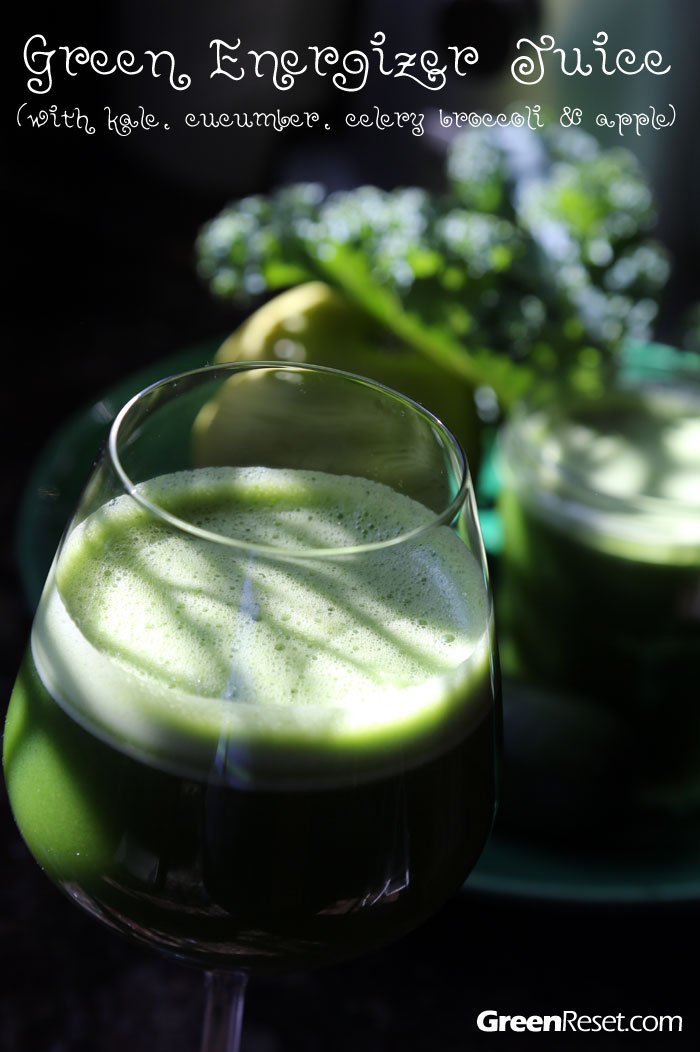
After long winter (and gallons and gallons of green smoothies), I’m craving juices. Today, I’ve made some green juice – just looking at it makes you feel energized!
Green juice packed with vegetables is all the rage these days. It can be prepared with a variety of ingredients, such as kale, celery, broccoli, cabbage, cucumber, apple, kiwi, parsley and/or cilantro.
Juicing kale, broccoli, celery or parsley adds that green color and a multitude of health benefits. Throw in a sweet element to keep the juice palatable, but going too sweet may result in a dessert juice rather than a drinkable vitamin.
For beginners, I’d advise to steer clear of adding too much cabbage, cilantro or parsley (only because you may find the flavors too strong), and add more cucumbers, apples, a pear or a kiwi – to make it sweeter.
Green Juice Recipes
So, if you are willing to try a great juicing recipe for green vegetables and kale that will give you lots of energy, here it is.
Basic version:
4-5 celery sticks
5-6 leaves of kale (or other leafy greens)
1-2 apples or pears (green apples are less sweet, more tart)
1 lemon (if not organic, then the lemon should be peeled)
Additional/optional ingredients:
1 cucumber
1/4 of a small cabbage
1/4 to 1/2 ripe papaya (1/2 results in a sweeter juice)
1 handful of parsley or cilantro
1 thumb-sized nob of ginger
You may also like to add some beets or carrots, but then of course it will no longer be a green juice. Some people like to add small slice of garlic and/or ginger.
Drink to your health and boost your immune system!
Other Juice Recipes to Try
Super Red Beta Carrot Juice

Questions? Comments? Suggestions?
If you have a favorite recipe, why not submit it here in the comment section of this smoothie recipes blog for others to enjoy too!
I also welcome any comments, questions and suggestions. Thanks!
Should I blend or should I juice? – that seems to be the question recently…
Sometimes it’s tough to decide 😉
It’s been a while since I purchased my new Breville juicer to join my kitchen appliance team (and replace the old one, which was long-ago ready to leave its post), and we continue our mini Juice Reboot morning routine (or mini-detox-cleanse) with my husband (who is the main reason I bought the juicer in the first place, as I could not get him to drink enough smoothies, and I think may be more inclined to drink juices).
I have to say it’s been working really well so far, even though it does make the mornings a bit more busy and it takes a bit more time to get everyone out of the house. We’ll continue it for just a couple of days more, until my husband leaves on a trip, and then resume when he comes back in almost three weeks.
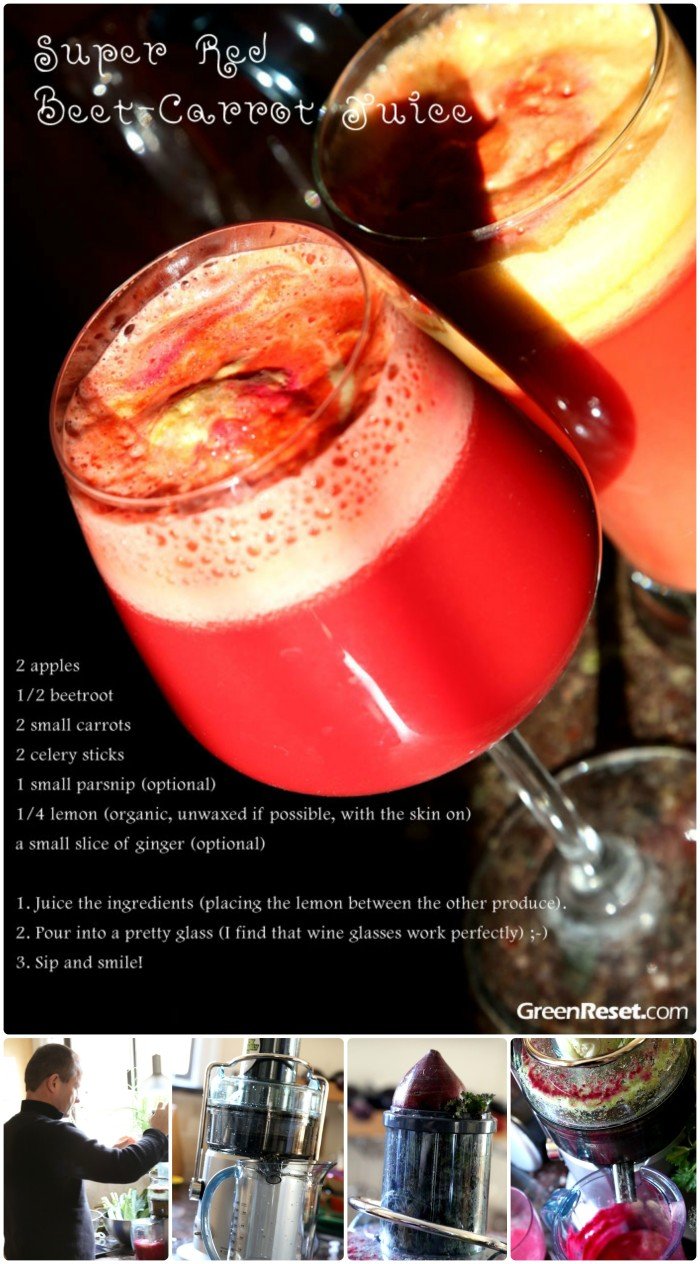
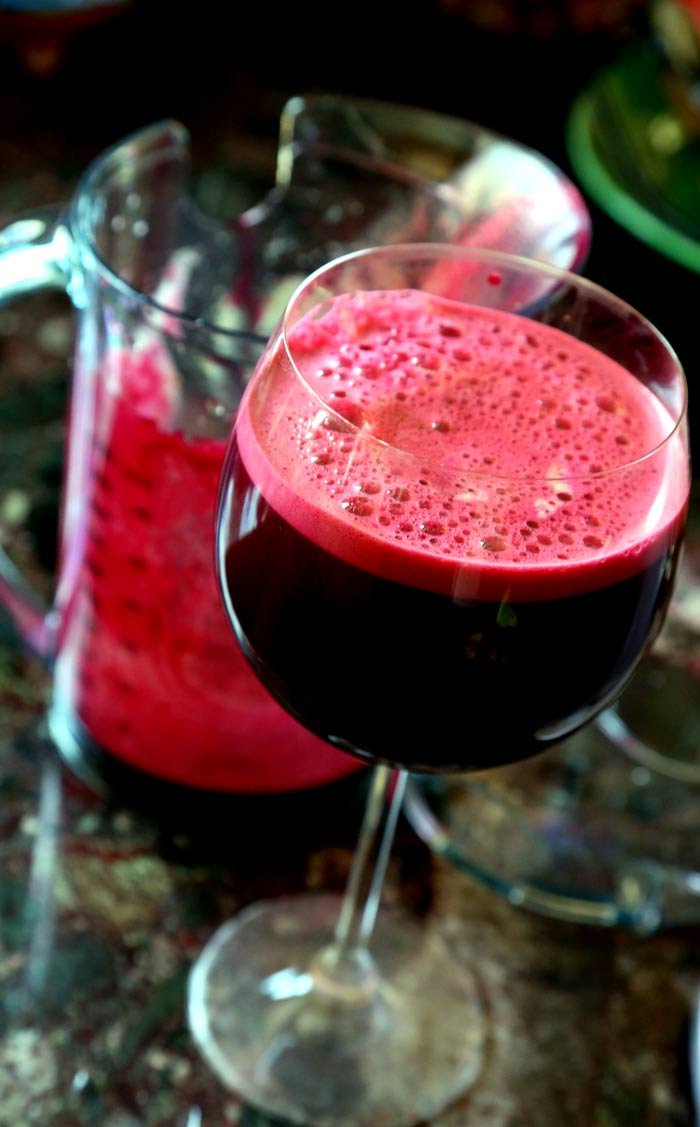
So today, we made this rich vibrant beetroot juice with carrots, celery and apple.
I also found a recipe that uses parsnips – which I have to say – I never juiced before. I didn’t have parsnips, so I’ll try it next time and let you know how it tastes. What I can tell you right now, that the combination below (without parsnip), creates a truly delicious nutrient packed juice.
Super Red Beta-Carrot Juice Recipe
Super Red Beta-Carrot Juice
Ingredients
- 1 apple (or use two for a sweeter juice)
- 1 beetroot
- 2 small carrots
- 2 celery sticks
- 1 small parsnip (optional)
- 1/4 lemon (organic, unwaxed if possible, with the skin on)
- a small slice of ginger (optional)
Instructions
- Juice the apples, beetroot, carrots, celery, parsnip and lemon (pack the lemon between the other produce).
- Pour into a pretty glass (I find that wine glasses work perfectly), sip and smile!
3.1
https://greenreset.com/super-red-beta-carrot-juice/
Despite some of the ‘earthy’ ingredients, the apple, beetroot and carrots actually have a sweet flavor, which work together to create a delicious juice. Ginger and lemon will give this juice a nice tangy kick.
The use of carrots in the fight against cancer has been well-documented due to their high beta carotene content and the presence of the natural fungicide falcarinol. Beetroot is a great source of iron, which means it helps purify the blood. This juice is superb for helping to build the blood and is great for fighting infections – juice just what the doctor ordered!
Questions? Comments? Suggestions?
If you have a favorite recipe, why not submit it here in the comment section of this smoothie recipes blog for others to enjoy too!
I also welcome any comments, questions and suggestions. Thanks!
Although I’m a great believer in green smoothies and I pretty much gave up on juicing the last couple of years, I decided to give juicing another try.
Just a few days ago I purchased a brand new Breville juicer (which, by the way, came with a free DVD “Fat, Sick and Nearly Dead” movie), brought a few bags of produce from a farmers market, and set of to make some colorful juice.
So I made a few quarts of vegetable juice and we sat down with my husband (who, incidentally, came down with a fever and a nasty virus infection) to watch the Joe Cross documentary of his 60 juicing reboot.
Here is why.

The Benefits of Juicing: My Top 4 reasons why you may want to give juicing a chance
There are probably many more convincing arguments for juicing, but let’s just start with these four:
Juicing Benefit # 1. Certain vegetables are simply better suited for juicing than blending.
I mean, I’m pretty open minded, and I have tried my share of beet smoothies, carrot smoothies and cabbage smoothies (and I wrote about them on this blog), but let’s face it – for most people these smoothies won’t be palatable, unless you only include a tiny amount of these vegetables and cover the taste with lots of sweet fruits, herbs, lemon and/or ginger – which is still beneficial, but considering the enormous nutritional power that they contain, it’s a shame not to consume more of them regularly.
These vegetables include already mentioned roots, such as beets, sweet potatoes, carrots or parsnips; as well as cabbage, broccoli, and other.
They work great in juices, whereas in smoothies they will only work in small quantities. So, if you are like me, not eating enough of these veggies, then juicing will let you add more variety to your diet.
Juicing Benefit # 2. When we drink juices, the body works less to digest the nutrients.
I love how filling green smoothies are, but sometimes you want to give your body a break from even the healthy fibers. Juice, the liquid without the fiber, allows your digestive system to work less to extract the benefits.
For people who want to really re-set their system (as in the juice reboot “Fat, Sick, and Nearly Dead“), taking a finite break from fiber has the benefit of allowing your digestive system to have a bit of a rest.
Juicing Benefit #3. More vegetables per glass.
You can consume more vegetables and greens into a single glass of green juice than you would in a smoothie serving.
Juicing Benefit #4. The “Fat, Sick, and Nearly Dead” documentary
I wish someone made a documentary about green smoothies, but for now we have Joe Cross’ film about a juice detox cleanse. Here why I love it so much.
I don’t need to be persuaded of the benefits of plant based nutrition. However, whenever I talk to my husband about it, he replies that he needs his meat and dairy for protein and other nutrients; that he feels week without them, that he needs animal foods to build muscle, etc.
Don’t get me wrong. He is not a meat-and-potato kind of guy and he does like his veggies; but he doesn’t eat nearly enough of them.
So, what I love about the movie is that it’s about a regular guy in his forties (my husband is a few years older, but generally close enough in age to be able to relate to him), who gets sick and tired of feeling sick and tired, and goes on a juice cleanse, and switches to a 100% plant-based nutrition, no fish, meat or dairy whatsoever; and looks and feels GREAT as a result.
Not weak, or overly thin, but very strong and athletic. Plus he seems about 10 years younger.
He also cures his diseases and goes completely off of all medications he’d been taking for years.
All this definitely got my husband’s attention, and – although I don’t expect him to become vegan or go on a 60 day juice cleanse – I do think that the movie shook a bit his deep-belief on the necessity of animal products to keep healthy and strong – a belief that has been holding him from achieving better health and losing weight.
So he finally agreed to make some substantial changes to his diet, which makes me very happy.
You can find “Fat, Sick, and Nearly Dead” documentary on Amazon and Netflix).
The juicer that Joe has been using (BTW it’s the one that I bought too) is Breville Juice Fountain, which you can find on Amazon or in any store that carries kitchen appliances.
Juicing or blending, which is better?
Whether you choose blending or juicing, you are gifting your body improved health by using these nutrient packed drinks. Regularly drinking smoothies or fresh, veggie-based juice will:
- increase your veggie intake dramatically
- make it easier and quicker for your body to absorb nutrients because the blending and juicing allows the foods to become somewhat “pre-digested”
- curb appetite and reduce cravings for sugar and processed foods because you are nourishing your cells with what they are asking for – micronutrients. You body no longer craves the “carbs” (macronutrient).
So, it’s a win-win-win!

Questions? Comments? Suggestions?
If you have a favorite recipe, why not submit it here in the comment section of this smoothie recipes blog for others to enjoy too!
I also welcome any comments, questions and suggestions. Thanks!


