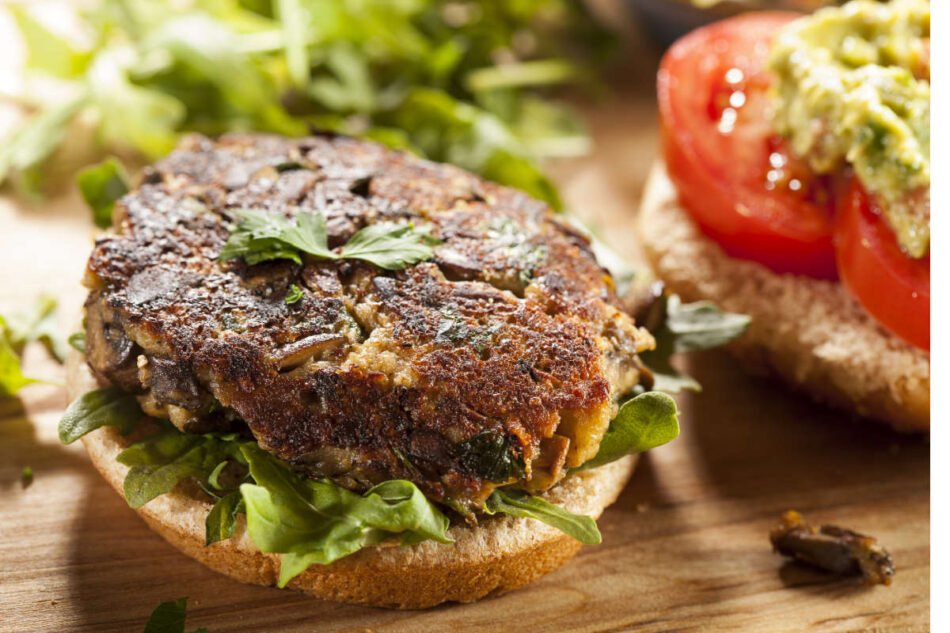
If you’ve ever tried making veggie burgers at home and ended up with a crumbly, mushy mess… I get it. Been there. For years, I skipped the homemade route and just bought store-bought patties. They were easy, they didn’t fall apart, and they did the job.
But after a while, those packaged burgers all started to taste the same — overly processed, overly salty, and frankly a little boring. And I realized something important: I was missing out on the creative, satisfying world of making my own burgers at home.
And here’s the kicker: it’s so much easier than I thought.
Why Bother Making Veggie Burgers at Home?
You might be wondering: Why should I make my own burgers when there are so many options in the store? Here’s why:
Healthier: You control the ingredients — no fillers, preservatives, or mystery oils.
Cheaper: A few pantry staples (beans, grains, spices) cost a fraction of a frozen box.
Infinitely creative: You’re not stuck with “black bean” or “quinoa kale” over and over. At home, you can make falafel-inspired burgers, smoky BBQ patties, lentil-walnut cutlets, curry-spiced nuggets… the options are endless.
Surprisingly fast: If you can make a smoothie or a bean dip, you can make burgers. The method is the same — blend your base, season it, shape it, and cook. Done.
And unlike a salad or a bowl of beans, a burger actually feels like a meal. It’s dense, chewy, and satisfying — the kind of food that keeps you full and happy.
The Secret Ingredient That Changed Everything
Here’s where my story gets interesting. I always thought veggie burgers were too tricky, until I discovered one magic ingredient: vital wheat gluten.
If you’ve never heard of it, vital wheat gluten (sometimes called seitan flour) is the protein from wheat, ground into flour. When you add it to beans, veggies, or grains, it works like edible glue. Suddenly, your burgers:
Hold together instead of falling apart.
Get that “meaty” chew you’ve been missing.
Feel hearty and filling, not mushy or flimsy.
It’s like a miracle fix for veggie burgers. Once I tried it, everything changed — and even my husband (a tough food critic) said, “Wow, these are perfect.”
How Easy Is It, Really?
Think about it this way:
Stop blending early → you’ve got hummus or a spread.
Add more liquid → it’s soup.
Add gluten, oats, or breadcrumbs → it’s burger mix.
That’s all. One fork in the road, one or two added steps, and you’ve got dinner.
You don’t even need a fancy machine. A food processor makes it faster, but you can mash beans with a fork, chop veggies with a knife, and stir it all together in a bowl. Burgers are forgiving — unlike baking cakes, you don’t need exact measurements. Too wet? Add oats. Too dry? Add mashed potato. Too bland? More spices. Almost every “mistake” can be fixed on the fly.
A Sample Recipe: Smoky Chickpea–Potato Cutlets
Here’s a simple one to get you started:
Ingredients (makes 6 patties):
1 cup cooked chickpeas
1 medium cooked potato, mashed
½ cup walnuts or pumpkin seeds (chopped)
½ small onion, grated
2 cloves garlic, minced
1 tsp cumin
1 tsp smoked paprika
Salt & pepper to taste
½ cup vital wheat gluten (add more if mixture is too wet)
Oil for frying (or bake/air-fry)
Instructions:
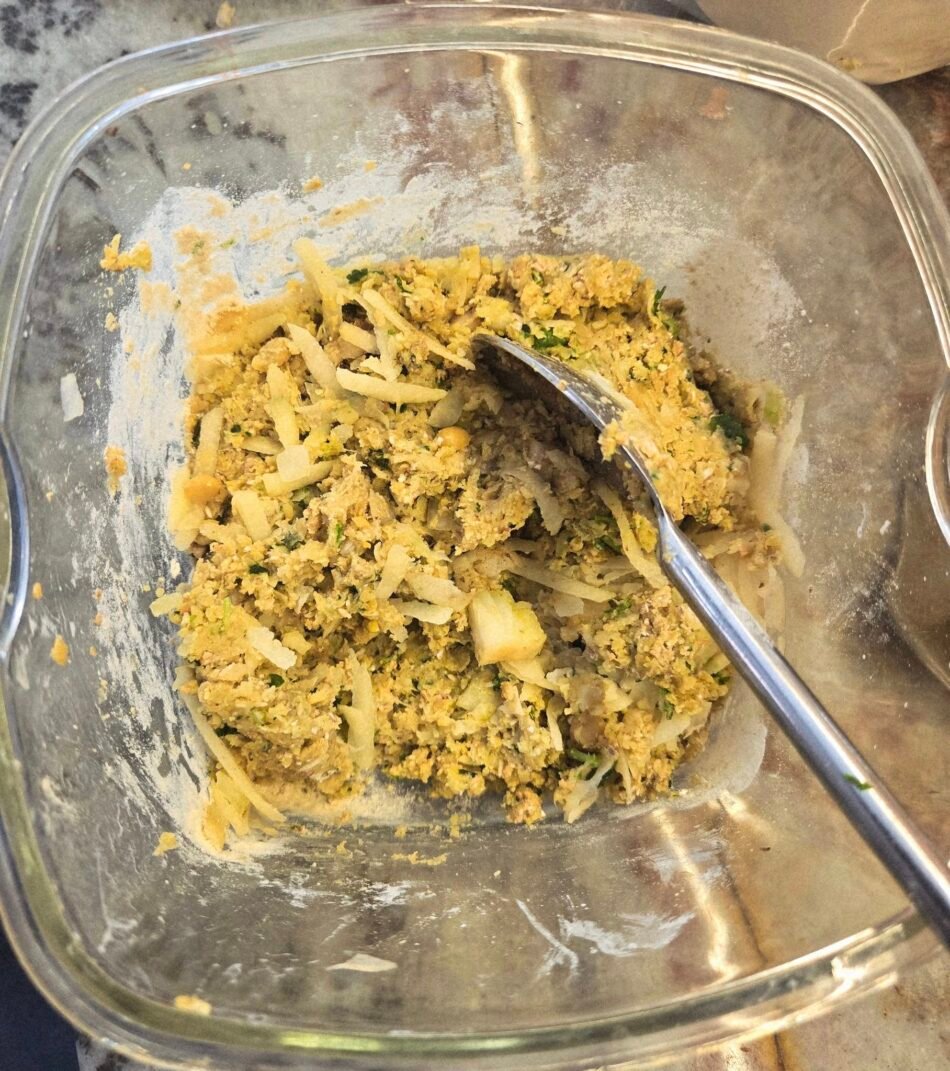
Mash or blend chickpeas, potato, onion, garlic, and spices until fairly smooth.
Stir in walnuts and vital wheat gluten. Mix gently until dough comes together.
Shape into 6 patties.
Pan-fry (3–4 minutes per side), bake at 190°C / 375°F for ~25 minutes, or air-fry at 200°C / 400°F for 15–18 minutes.
Result: Hearty, chewy cutlets with a smoky falafel vibe — perfect in a bun or on top of a salad.
Variations to Try
BBQ Black Bean Burgers: Black beans + quinoa + gluten + smoked paprika + BBQ sauce.
Once you’ve got the formula, you’ll realize: this isn’t just a recipe — it’s a system. You can take whatever you have in your fridge, throw it in the blender, add gluten to hold it, and call it dinner.
The Veggie Burger Playground
Making your own burgers isn’t about following one perfect recipe. It’s about stepping into the playground of endless possibilities. Some nights you’ll go smoky, other nights herby, other nights spicy. Each batch is unique.
And the best part? Every burger you make at home is healthier, fresher, and more satisfying than anything that comes in a box. Once you taste your own chewy, meaty, plant-based burger — one that doesn’t crumble, one that sticks together perfectly — you’ll never go back.
So go ahead. Open the fridge, grab what you’ve got, and start experimenting. Your burger playground is waiting. 🌱🍔
PS. Meaty Plant-Based Burgers book is coming! Check it out here:
Can you imagine seeing that headline? A TV commercial or glossy magazine ad—just like the ones for meat—except this time starring… broccoli. Or cauliflower. Maybe even Brussels sprouts or cabbage, growing in idyllic fields with sunshine and birdsong.
Ha! I’d be thrilled. Just picture it—those ads appearing nationally, everywhere: on billboards, blogs, Google Ads, YouTube pre-rolls, even during the Super Bowl.
But let’s be real. Who would pay for such a commercial? Who could realistically afford it? Certainly not broccoli growers. They don’t have the kind of money that animal agriculture has—heavily subsidized and backed by a massive marketing machine that’s convinced most of society that “protein = meat.” These industries not only dominate ad space but also fight aggressively to protect their turf—remember when Oprah got sued for criticizing beef? Or the legal battles over Just Mayo and the word “milk”?
They’d probably even object to using the word “steak” to describe a broccoli dish. Because heaven forbid broccoli isn’t just a side dish—but the main event.
And yet, it should be. These simple, whole plant foods? They’re the healthiest for people. The most sustainable for the planet. And the kindest to animals. So yes, broccoli steaks.
And Here is a Fun Fact for all Language Purists (You Know Who You Are!)
“Steak” originally referred more to how food was cooked or served than what it was made of. So calling something like broccoli a “steak” isn’t a misnomer—it’s a return to form.
That’s right! The word “steak” comes from the Old Norse word “steik”, which means “roast” or “meat cooked on a stick.” It entered the English language in the 15th century, likely through the influence of Viking invasions in northern England and Scotland.
Old Norse “steik” → “roast on a spit”
Adopted into Middle English as stek(e), referring to a slice of meat for roasting or broiling.
Over time, “steak” came to mean a thick slice of meat (especially beef), cut across the muscle grain. Eventually expanded to fish (tuna steak, salmon steak), and now—deliciously—to plant-based foods (like cauliflower or broccoli steaks), which mimic the shape, thickness, or centrality of the dish.
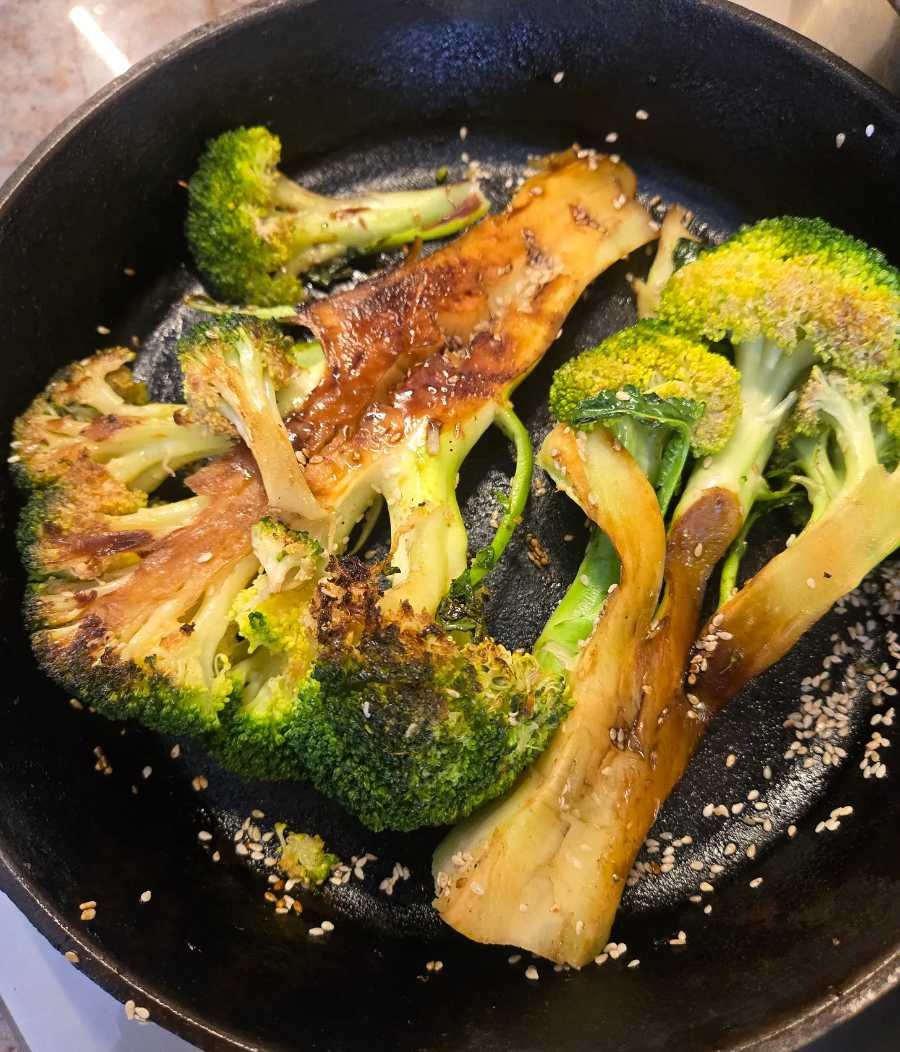
Anyway… I came across the idea in a cookbook I flipped through at a bookstore by an author completely unknown to me. But the recipe—charred broccoli “steaks”—completely blew me away.
🌿 Why Char the Broccoli?
As the author, Michał Korkosz explains:
“In plant-based cooking, we have to lean on technique to make vegetables exciting. Charring mimics the savory depth of grilled meat—it’s not a 1:1 replica, but it brings smoky, rich flavor while keeping the veggies firm and satisfying.”
Even a simple squeeze of lemon can do the trick—but this layered version? It’s got depth, brightness, and crunch. A celebration of plant-based boldness on a plate.
Now, I know what some meat lovers would think. They won’t even give this a proper eye roll. Broccoli steak? Seriously? Yup. Totally outrageous. Totally surprising. And totally delicious.
It’s unexpected. Innovative. And honestly? As simple and easy as it gets.
🥦 The Secret Behind That Broccoli Satisfaction
Here’s why broccoli—when cooked just right—is weirdly filling and satisfying:
• Fiber structure: That firm, al dente crunch slows digestion and helps you feel full longer. • Water content: Light cooking keeps it juicy and satisfying, without extra calories. • Micronutrients: Gentle heat preserves powerful compounds like sulforaphane, which support metabolism, immunity, and even cancer protection.
Mushy broccoli? It collapses in your mouth—and your stomach. Firm, golden, seared broccoli? It says, “You’re eating something real.”
Quick & Easy Roasted Broccoli Steak Recipe
Inspired by Michał Korkosz, author of the blog Rozkoszny
Ingredients (Serves 4)
1 large or 2 small heads of broccoli (about 1.1 lbs / 500 g), cut into florets or thick slices
4 tbsp extra-virgin olive oil
fine sea salt to taste
½ cup water (for steaming in the pan)
For the umami soy dressing:
3 tbsp dark soy sauce
1 tbsp apple cider vinegar
1 tbsp powdered sugar
3 tbsp water
For the lemon mayo:
⅓ cup plant-based mayonnaise
1 tbsp lemon juice
a pinch of salt to taste
Finishing touches:
2–3 tbsp poppy seeds or sesame seeds
Freshly ground black pepper
Method: Step-by-Step
1. Start with the sauces. In a small bowl, combine the soy sauce, apple cider vinegar, powdered sugar, and water. Whisk until smooth and the sugar is fully dissolved. Set aside. In a separate bowl, stir together the mayonnaise, lemon juice, and a pinch of salt. Taste and adjust for acidity—it should be bright and creamy.
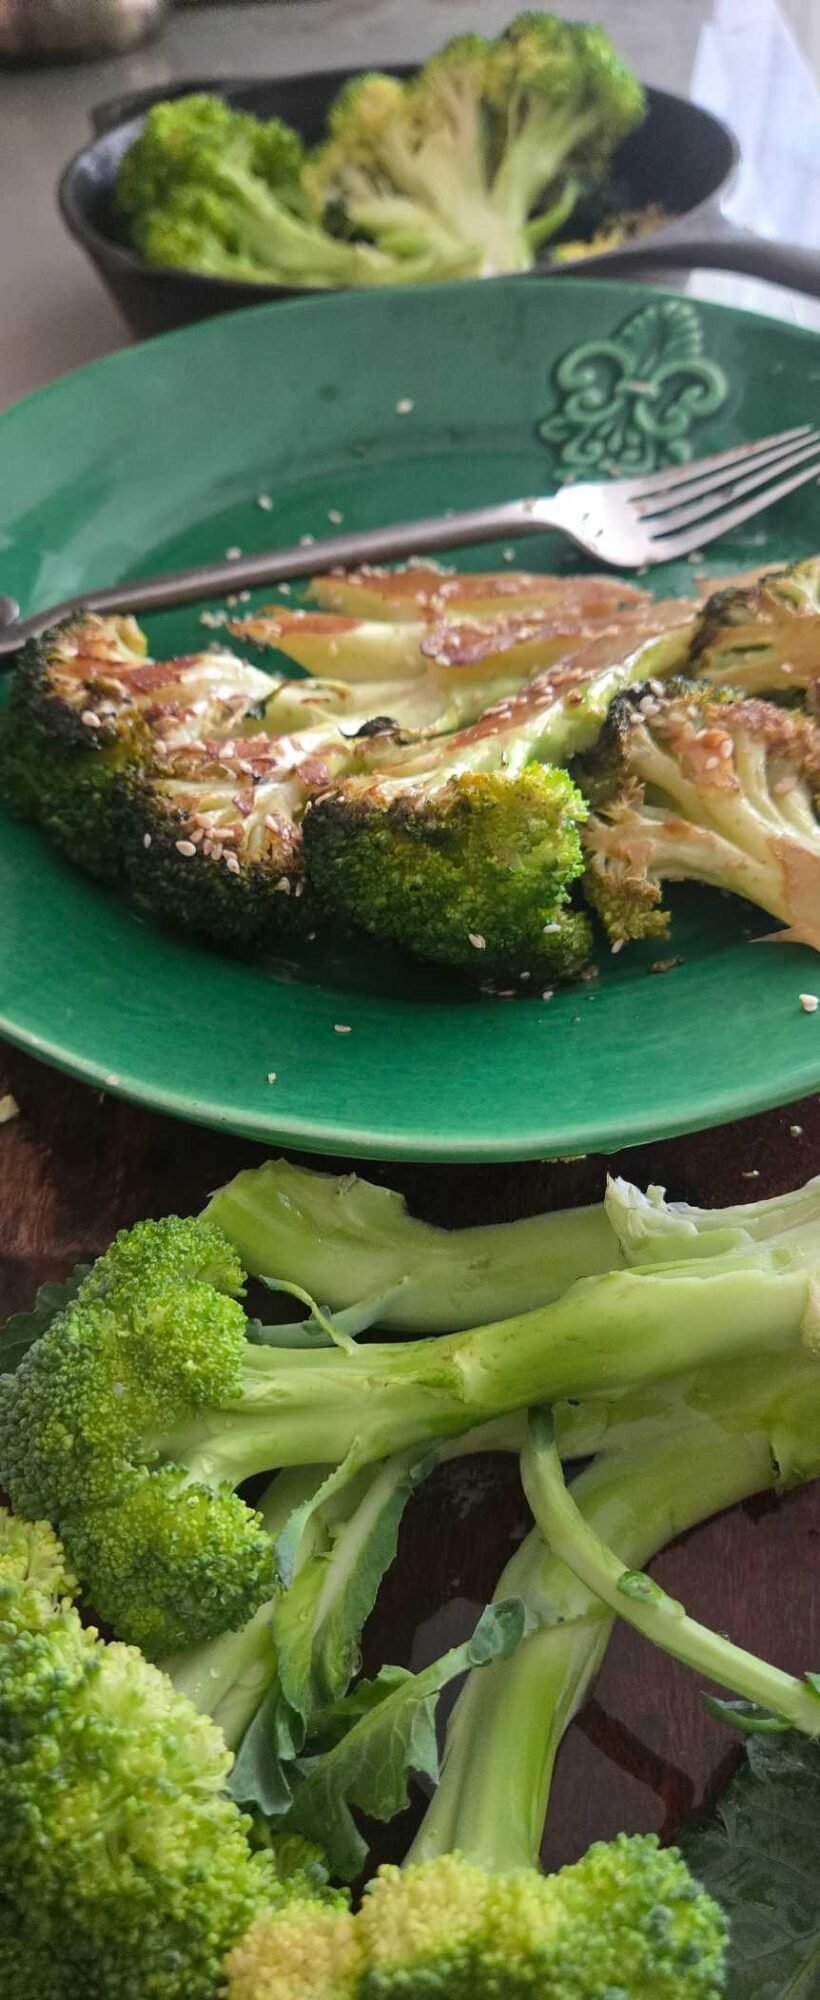
2. Prepare and char the broccoli. Trim the ends of the broccoli and slice any thick stalks in half lengthwise to create flat surfaces. Heat the olive oil in a large skillet or cast iron pan over medium to medium-high heat until shimmering but not smoking. Place the broccoli florets cut side down in a single layer. Press lightly to get good contact with the pan. Let them cook, undisturbed, for 2–4 minutes, or until visibly charred and golden-brown on the bottom. Add ½ cup (120 ml) of water to the pan and immediately cover with a lid to steam. Let cook for another 4–5 minutes, until the water evaporates and the broccoli is crisp-tender—not mushy. Remove from heat.
3. Assemble the dish. Transfer the broccoli to a serving plate. Drizzle generously with the soy dressing. Add a few dollops of the lemon mayo or serve it on the side. Sprinkle with poppy seeds and finish with freshly ground black pepper. Serve warm as a main course or hearty side dish.
Now Go and Have Fun with Endless Variations!
You can play with flavors—think sesame and soy for an Asian twist, curry spices with a side of dal or chickpeas, Italian-style with breadcrumbs and tomato sauce, or go bold with a classic steak-style marinade. Cook it how you like: oven-roasted, pan-seared on your favorite cast iron skillet, or grilled. And pair it with what you love: quinoa (for extra protein), golden breadcrumb-coated potatoes (for that cozy meal vibe), pasta, polenta, lentils, black beans, tofu, or salad. It works. Every. Time.
So, after years of eating plant-based, I’m happy to say that I’m still surprised by new recipes. And in recent years? I’m surprised even more often. Because more and more people—especially chefs—are entering the plant-based space, experimenting and elevating plants to their true potential.
Gone are the days when the only “vegan meal” was boiled carrots and bland steamed vegetables. (Yes, I remember this. It was three decades ago, when I didn’t even know veganism existed.)
Now we’re living in a golden age of flavor—from global dishes to cutting-edge plant-based products. And the pace is only accelerating.
I can’t wait to see what the next 10, 20 years will bring. It gives me hope. And motivation.
Because when you think about it, traditional cuisines took generations to evolve. So the innovation we’re seeing now? It’s just the beginning. And in the meantime, I’m more than happy living off the incredible plant-based bounty we already have.
This isn’t your average stir-fry—this is a bold, bitey, broccoli-powered bowl of plant-based bliss. Imagine big, pan-seared slabs of broccoli—charred just enough to give them attitude, but still crunchy enough to fight back.
Paired with silky bok choy and crispy golden tofu cubes, this dish is drenched in umami flavor with just the right hint of sweet onion caramel and nutty sesame. Topped with a sprinkle of seeds or cashews, and nestled on a cloud of quinoa or brown rice, it’s the kind of meal that fills you up without weighing you down.
✨ It’s clean. It’s bold. It’s got protein punch, fiber flair, and green glory all in one skillet.
Your tastebuds? Thrilled. Your stomach? Satisfied. Your body? Saying, “Yes, more of that, please!”
The Secret Behind Broccoli Satisfaction
Surprise! Broccoli can be incredibly filling—leaving you full, content, and strangely smug—as long as it’s not overcooked.
It’s one of my favorite go-to ingredients, ideal for preparing quick meals, that are also super nutritious, satisfying, and all-around just plain delicious.
And here’s why.
When broccoli is lightly cooked—think sautéed, roasted, or seared—it holds onto its best assets. The fiber structure stays intact, giving it that satisfying “bite” that slows down digestion and helps you feel fuller, longer. No limp mush here—just real texture that tells your body, “You’re eating something substantial.”
It also keeps its natural water content, which adds juicy volume without adding calories. That means you can load up your plate without feeling weighed down.
And then there’s the nutritional edge. Overcooking broccoli doesn’t just kill texture—it kills nutrients too. Key compounds like sulforaphane (a potent antioxidant linked to cancer prevention and detoxification) break down with excessive heat. A quick sear or steam keeps them alive and kicking, and makes them easier to digest than raw.
So yes, mushy broccoli collapses in your mouth—and in your stomach. But firm, lightly cooked broccoli? That stuff stands its ground. It fills you up. It’s what satisfying food should feel like.
“What does 25 grams of protein look like?”
So you’re scrolling through the internet looking for “high-protein foods,” and bam—there it is again… A smug little graphics showing 3 ounces of beef sitting next to 1.5 cups of beans or a small mountain of quinoa, and a long row of spoonfuls of peanut butter with about million calories.
The message?
“See? Beef is superior. Fewer calories. More protein. And complete protein at that. Filling and satisfying. Game over.”
But here’s what they’re not showing you:
The fiber content: Zero in meat
The antioxidants: Zero
The phytonutrients, gut-supporting compounds, and disease-fighting benefits: Zero
The cost to your heart, your colon, and the climate? …well, let’s not get started.
The suffering of animals… beyond measure…
Those graphics aren’t nutrition education. They’re marketing dressed up in charts!
Enter the Green Goddess of Satiety: Broccoli
Here’s the truth: a big bowl of stir-fried broccoli, bok choy, and tofu can leave you feeling more full, energized, and nourished than any sad little slice of meat. Why?
Because when you don’t boil the life out of it, broccoli has everything going for it:
Crunch and texture → tells your body “I’m eating real food.”
Micronutrients and antioxidants → fuel your cells, not just your macros.
And yes, protein too. The healthy, kind, and sustainable kind.
🌱 Broccoli & Bok Choy Stir Fry with Tofu Recipe
A complete meal made from actual food—plant-powered protein (protein 5.0!), fiber, crunch, color, and comfort in every bite.
Ingredients:
1 block firm tofu, ~400g (📦 ~36g protein)
2 cups broccoli florets or “steaks” (🥦 ~6g protein)
2 cups bok choy, chopped (🥬 ~3g protein)
1 small onion, sliced
1 tbsp sesame oil (or water for low-fat version)
1 tbsp soy sauce or tamari
1 garlic clove, minced
1 tsp grated ginger (optional)
1 tbsp sesame seeds (optional, ~2g protein)
2 tbsp roasted cashews (optional, ~3g protein)
1 cup cooked quinoa or brown rice per serving (🍚 quinoa: ~8g protein, rice: ~5g)
Method:
Crisp the tofu: Cube and pan-fry the tofu until golden. Set aside. Sear the broccoli: Begin by cutting the broccoli into diagonal pieces, like steaks, before searing. In a hot cast iron pan (or a regular pan), sear big broccoli chunks until browned but still firm. No mush allowed! Set aside with tofu. Sauté the aromatics: Add onion to the pan and let it caramelize. Toss in garlic and ginger for a hit of flavor. Add bok choy: Stir in the chopped greens, cook just until tender and still vibrant. Sprinkle with sesame seeds, allowing them to brown slightly. Mix it all up: Return tofu and broccoli to the pan, splash with soy sauce, and stir to coat. Serve: Serve over quinoa or brown rice.
Makes 2 generous servings: perfect for sharing or save some for later.
Total per serving (w/ quinoa, no cashews): ~25–27g of protein, 100% plants, fiber-rich, full of antioxidants
Why This Meal Crushes That 3-Ounce Steak
You know those graphics showing 25g of protein from beef at just 173 calories? Sure. It’s low calorie… but also low everything else. Compare that to this meal:
Protein? Check.
Fiber? Loads.
Micronutrients? From magnesium to vitamin C to calcium.
Antioxidants? Oh yeah.
Phytonutrients and anti-inflammatory compounds? You bet.
That beef? It’s a component. High in environmental cost and animal suffering.
This bowl? It’s a meal—complete in the way your body actually needs. Full of nutrients, goodness, and kindness—to the planet, animals, and people.
So, the next time you see one of those “What does 25 grams of protein look like?” infographics, ask yourself: Where’s the fiber? Where’s the color? Where’s the life? Don’t fall for protein tunnel vision. Eat like your health—and the planet—depends on more than just macros. Because it does.
This Curried Cauliflower & Split-Pea Soup is a cozy, flavorful bowl of plant-powered goodness—with a seriously impressive sustainability score to match! Packed with protein-rich split peas and colorful veggies, it’s super budget-friendly, low-waste, and cooks up in a flash thanks to the magic of a pressure cooker. No soaking, no fuss—just a creamy, comforting soup that’s kind to your body, your wallet, and the planet. Whip up a big batch and feel like a kitchen wizard making the world better one spoonful at a time!
This soup is the ultimate comfort food that’s so quick to prepare it’s shocking! It literally takes me about 20 minutes from decision to the steaming bowl.
Don’t believe me? Suspect me of cheating or exaggerating? Having some dark superpowers? No, I just use the right equipment.
Namely, a pressure cooker. An essential kitchen tool for anyone who eats a plant-powered diet.
A pressure cooker is an incredibly useful kitchen appliance, especially when it comes to easily and quickly preparing all sorts of legumes, from lentils to beans. It dramatically cuts down on cooking time, producing tender beans and chickpeas that are otherwise difficult to achieve, even after hours of cooking, thus saving time and energy.
This soup is very filling, rich in plant protein, and cheap to make.
It’s also incredibly smooth and creamy, even without a blender! The problem with cooking veggies in a pressure cooker is that they easily get too soft and turn mushy, but this soup actually benefits from that effect. This And I don’t even bother chopping the veggies finely—they get soft enough on their own. to smooth consistency or served as is.
Split peas don’t require soaking, so that speeds up the process even more.
Creamy Split Pea Soup with Veggies—Ready in Just 5 Minutes (Pressure Cooker Recipe)
Ingredients:
2 cups yellow split peas, rinsed
4 cups water
Vegetables: add what you like or have, for example:
½ head of cauliflower, and/or broccoli, 2 leaves of kale, ½ bunch spinach
1 large carrot, 1 sweet potato, 1 potato
2 celery stalks, 1 parsley root, 1 small piece of celery root
Spices: 1 teaspoon curry powder
1 teaspoon marjoram (optional)
A pinch of dry ginger (optional)
Salt and black pepper, to taste
Method
Add everything to the pressure cooker and start cooking on high until it seals. Continue cooking for about 4-5 minutes. Let it simmer for a few more minutes, allowing the pressure to be released naturally. Open the lid, adjust the seasoning, and enjoy the thick, creamy texture.
Storage:
The soup can be refrigerated for up to 5 days or frozen in smaller portions for future meals. Add a bit of water or vegetable broth when reheating if it’s too thick.
Nutritional Breakdown: Servings: 6-8, Calories per Serving: 250-300 calories, Carbohydrates: 45-55 grams, Proteins: 15-20 grams, Fats: 1-2 grams, Fiber: 15-20 grams. These values are approximations, and actual nutritional content can vary based on specific ingredient types and amounts.
Cooking Beans: Pressure Cooker vs. Thermomix vs. Slow Cooker
I’m kicking myself for not using a pressure cooker sooner, or an electric cooker, like Instant Pot. Beans were such a struggle before! Don’t make the same mistake. Seriously, unless you only use canned beans, or maybe have some other fancy equipment that cooks the food for you – like a Thermomix or some slow cooker — you should seriously consider investing in a pressure cooker. And even if you have those, from what I know, pressure cookers are still superior. Here’s why:
Cooking Beans: Pressure Cooker vs. Instant Pot vs. Thermomix vs. Slow Cooker
Pressure Cooker: Fast and energy-efficient, perfect for cooking beans and legumes quickly without pre-soaking. Ideal for preparing meals in a fraction of the usual time while maintaining most nutrients due to reduced cooking duration. Especially great for split peas, which cook in just 5–10 minutes.
Instant Pot: A modern, electric version of the pressure cooker with added convenience. It features programmable settings, a delay timer, and keep-warm functions. It’s excellent for hands-off cooking of legumes like split peas (5–7 minutes on high pressure), lentils, or even soaked beans. Super beginner-friendly and widely used in plant-based kitchens.
Thermomix: A multifunctional appliance, capable of cooking beans with precise temperature control and built-in stirring. No high-pressure function needed for faster legume cooking, so it’s slower than a pressure cooker or Instant Pot. Best used when your recipe involves blending or multi-stage cooking (e.g., soups or sauces).
Slow Cooker: Ideal for a “set it and forget it” approach. Cooking beans takes longer (6–8 hours), but the result is tender, deeply flavorful legumes. It’s less energy-efficient and not ideal if you need your food fast, but perfect for prepping overnight or during the workday.
Using a pressure cooker for this recipe not only speeds up the process but also helps retain the nutritional value of the ingredients, making it a superb choice for healthy, quick meals.
🌱 My Overall Sustainability Rating of this Recipe: 9.5/10!
✅ 1. Ingredient Footprint – Very Low
Split peas are one of the most sustainable protein sources available. They require little water to grow, enrich the soil with nitrogen (which reduces the need for synthetic fertilizers), and have a low carbon footprint.
The other vegetables (cauliflower, carrots, potatoes, celery, etc.) are seasonal, local-friendly, and low-impact compared to animal products or exotic produce.
✅ 2. Protein Content – Excellent
Split peas are high in plant protein (~16g per cooked cup) and rich in fiber, making this soup a nutrient-dense alternative to meat-based soups without the environmental burden of animal agriculture.
✅ 3. Cooking Method – Efficient
Using a pressure cooker or Instant Pot dramatically reduces cooking time and energy use compared to stove-top simmering for hours or baking.
Compared to slow cookers or ovens, a pressure cooker uses up to 70% less energy and helps retain more nutrients.
✅ 4. Cost – Very Low
Split peas and root vegetables are some of the most affordable whole-food ingredients.
A big batch of soup can feed 6–8 people for the cost of a couple of store-bought meals or even less, especially if bought in bulk.
✅ 5. Waste & Packaging – Minimal
You can buy most ingredients (split peas, spices, veggies) loose or in bulk, which minimizes packaging waste.
Leftovers store and freeze well, reducing food waste.
🔄 Suggested Improvements for a Perfect 10:
Use home-composted veggie scraps if possible, or make broth from peelings before adding them to compost.
If using store-bought spices, choose recyclable glass jars or refill from bulk bins.
Cook with renewable energy (e.g., induction stove, solar panels) if available.
🌟 Overall Verdict: This soup is a model plant-based, low-waste, low-cost, high-protein, eco-friendly comfort meal. A regular in any sustainable kitchen!
My son is home for a couple of days from his studies abroad, so I must decide what to cook for him.
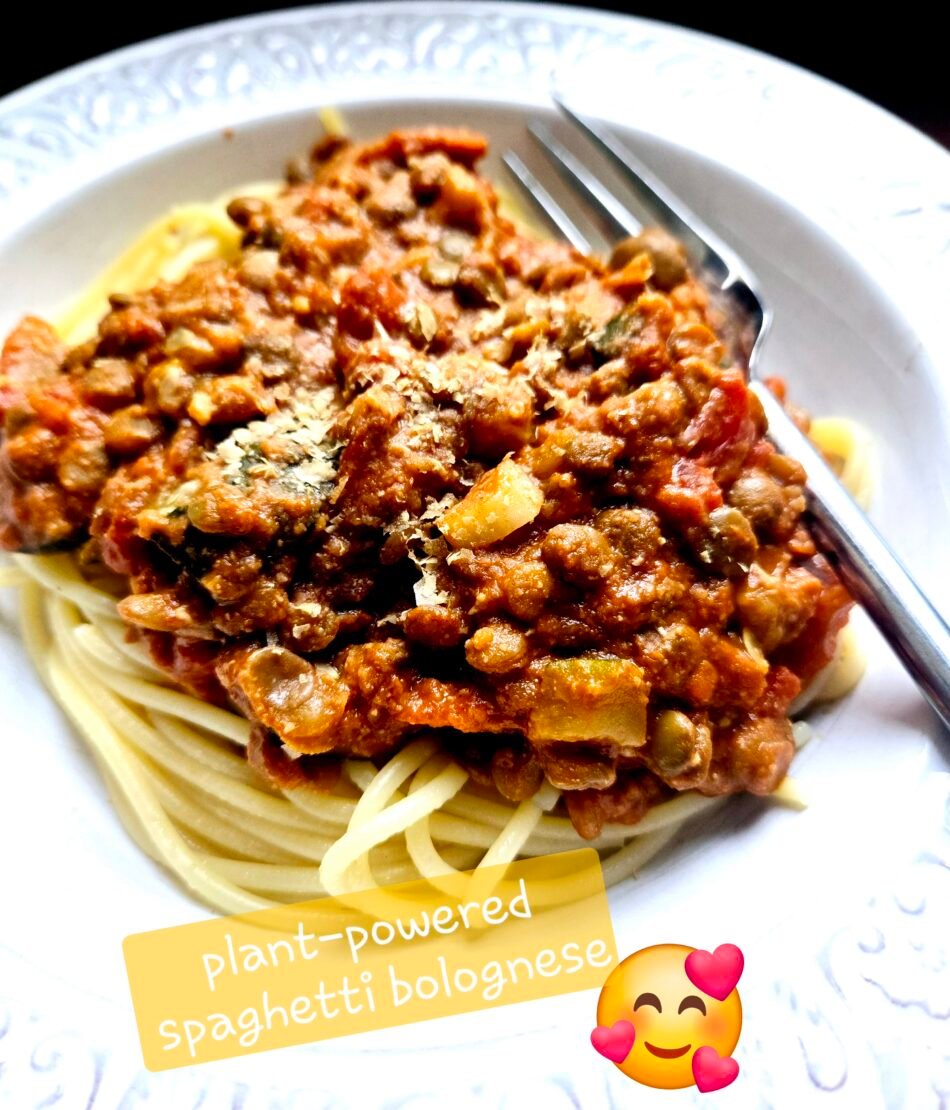
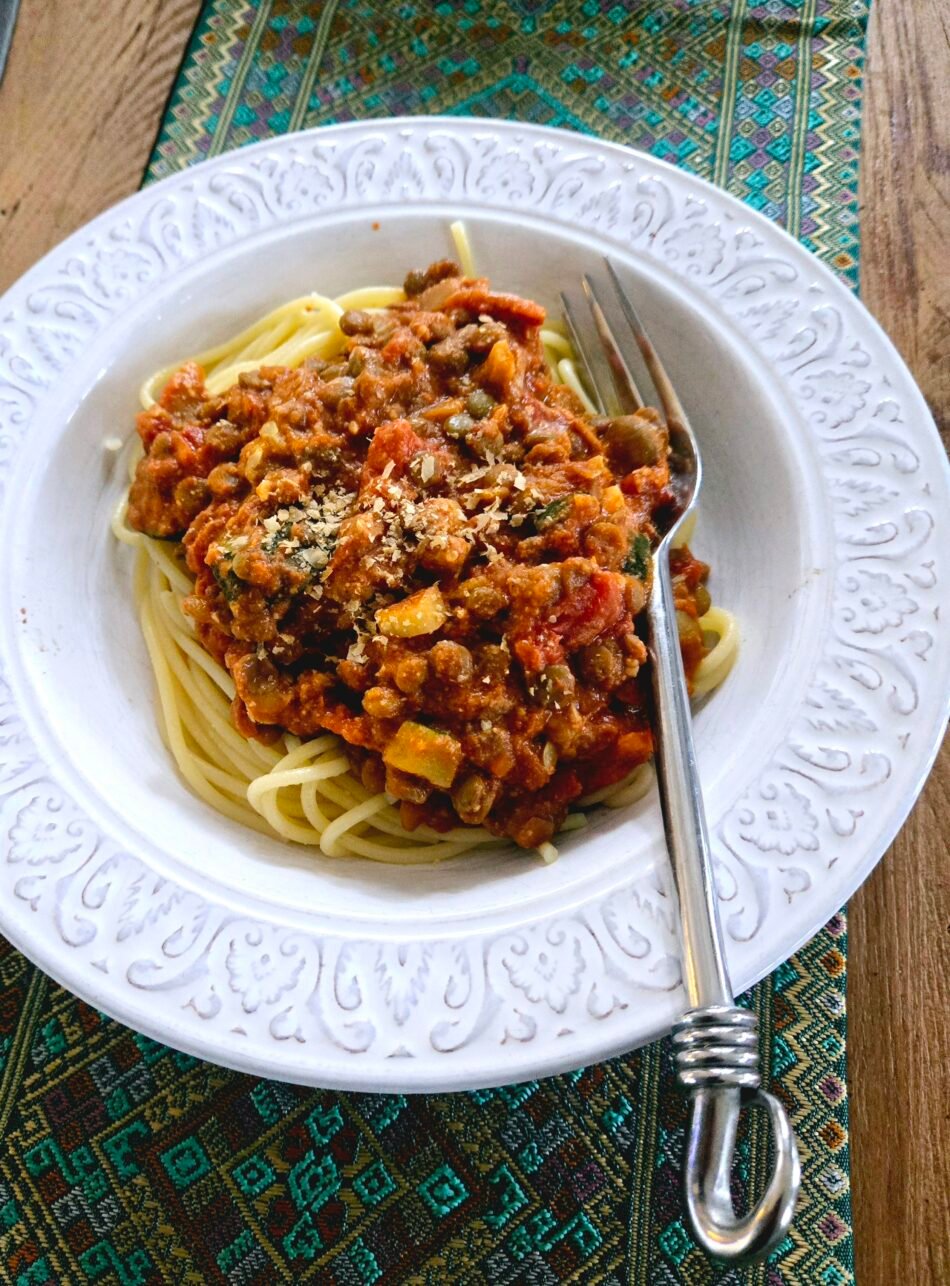
Spaghetti Bolognese it is!
The plant-based version of the dish, of course.
So, what can you substitute for meat in Bolognese?
Lentils, which have a meaty texture and are full of protein, make a great ground meat substitute. Add mushrooms (for savory flavor) and quinoa (optional, for chewy texture) to make your lentil Bolognese really shine.
Legumes in general, and lentils in particular, are overlooked by many people, but their versatility and nutritional value make them a game-changer for super-charging plant-based meals. Legumes are the wallflowers of the food world. Standing there in the back of the pantry, modestly packed with nutrients, quietly good for the planet, and utterly versatile, but they rarely get invited to the main event. In the U.S., they’re barely considered a side dish, if even that, let alone a star. And it’s a shame—because legumes are kind of amazing. Actually, scratch that—they’re completely amazing.
There are many variations of this recipe, but here’s the gist.
Mind you, if you ask an Italian, the traditional bolognese, usually doesn’t have any tomato in it. It’s a slow-cooked ragu made from beef with a blend of vegetables called a “soffritto” and a splash of milk (I mean, what?). It’s a hearty dish so comforting, like a hug after a long day.
And this recipe nails it, even if it’s way off from the original.
This Hearty Vegan Bolognese is exactly that. It’s rich, savory, and packed with deep umami flavor—and no meat required. Whether you’re serving it over pasta, noodles, zoodles (, or piling it into a lasagna, this bolognese delivers all the comfort of the Italian classic while being completely plant-based. (In case you’re wondering what zoodles are, they are essentially zucchini noodles, where raw zucchini is transformed into a pasta-like shape with a spiralizer or other cutting methods.)
Course: Main Course; Cuisine: Italian, Vegan; Servings: 4 serving
Calories: 228kcal
Ingredients
For the Sauce:
2 tablespoons olive oil
1 medium onion, finely diced
2 carrots, peeled and diced
2 celery stalks, diced
4 garlic cloves, minced
1 cup mushrooms, chopped (optional, for that extra “umami oomph”)
1 cup dried brown, green, or beluga lentils (or 1 can, drained and rinsed)
1/2 cup red wine (optional—if you’re feeling fancy)
1 can (28 oz) crushed tomatoes
2 tablespoons tomato paste
1 bay leaf
2 cups vegetable broth or water
1 teaspoon dried oregano
1 teaspoon dried basil
1/2 teaspoon dried thyme
1/2 teaspoon smoked paprika (optional, for a subtle smoky edge; or use 1 teaspoon of liquid smoke)
A pinch of red pepper flakes (more if you like spicy)
Salt and pepper, to taste
For the Pasta:
Spaghetti noodles (or any pasta you like)
For Garnish:
Fresh basil, roughly chopped
A drizzle of extra virgin olive oil (if you’re feeling extra indulgent)
Method
Prep the Veggie Squad: Heat the olive oil in a large, deep skillet or saucepan over medium heat. Toss in the diced onions, carrots, and celery. Sauté for about 5-7 minutes until the veggies soften and the aroma makes you question why you ever settled for boring takeout.
Garlic & Mushrooms to the Rescue: Add the minced garlic (and mushrooms, if using) to the pan. Cook for another 2-3 minutes until fragrant and the mushrooms have released their moisture. Your kitchen should smell like a five-star Italian trattoria by now!
Lentils Join the Party: Stir in the lentils. If you’re using dried lentils, give them a quick rinse before adding. Let them toast in the veggie mixture for about a minute to absorb all that flavorful goodness.
Wine Not? Pour in the red wine (if using) and let it simmer for 2 minutes, allowing the alcohol to evaporate and the flavors to meld. If wine isn’t your jam, simply skip this step and proceed to the next.
Tomato Time: Stir in the crushed tomatoes, tomato paste, and vegetable broth. Add the bay leaf, oregano, basil, thyme, smoked paprika, red pepper flakes, and a generous pinch of salt and pepper. Bring the whole concoction to a simmer.
Simmer, Simmer, Simmer: Reduce the heat to low and let the sauce simmer uncovered for 25-30 minutes. Stir occasionally. The lentils should be tender and the sauce thickened to perfection—rich, hearty, and begging to be spooned over pasta.
Pasta Party: While your sauce is working its magic, cook the spaghetti noodles according to the package directions. Drain and set aside. Feel free to toss them with a bit of olive oil to prevent sticking.
Assembly & Finale: Remove the bay leaf from your sauce and give it a taste. Adjust seasonings if needed. Then, serve a generous ladle of your lentil bolognese over a bed of spaghetti. Garnish with fresh basil and an extra drizzle of olive oil for that final, Instagram-worthy flourish.
Enjoy & Share: Dig in and savor the flavors! This dish isn’t just a meal—it’s a celebration of plant-powered deliciousness. Bonus points if you share it with friends and watch their jaws drop at the revelation that you didn’t use any meat.
Storage tip: Leftovers? This sauce tastes even better the next day. Store in the fridge for up to 5 days or freeze for a quick future meal.
Bon appétit!
Enjoy this edgy, plant-based twist on a classic, and let the lentils lead the flavor revolution in your kitchen!
You’ll find this recipe (or one like it) in my new upcoming plant-powered cookbook!
It’s still in the works as a part of my Green Reset series—in the meantime, check out my other cookbooks and children’s books on Amazon.
You know that feeling when you’re trying to do everything right for your health and the well being of your family, but somehow it never feels like enough?
Like when you’re worried about getting your kids to eat healthier, but they just want pizza? Or how you’ve been meaning to help your parents eat better, but they’re stuck in their old habits? Or how you promised yourself you’d take better care of your own health, but life — with all its chaos — keeps getting in the way?
Yeah, I know that all too well. 🙋♀️
But here’s something I’ve been thinking about a lot lately, and I wanted to share it with you: real change doesn’t need to be big and overwhelming. In fact, it’s the little things that count. And when it comes to family health, starting small is key.
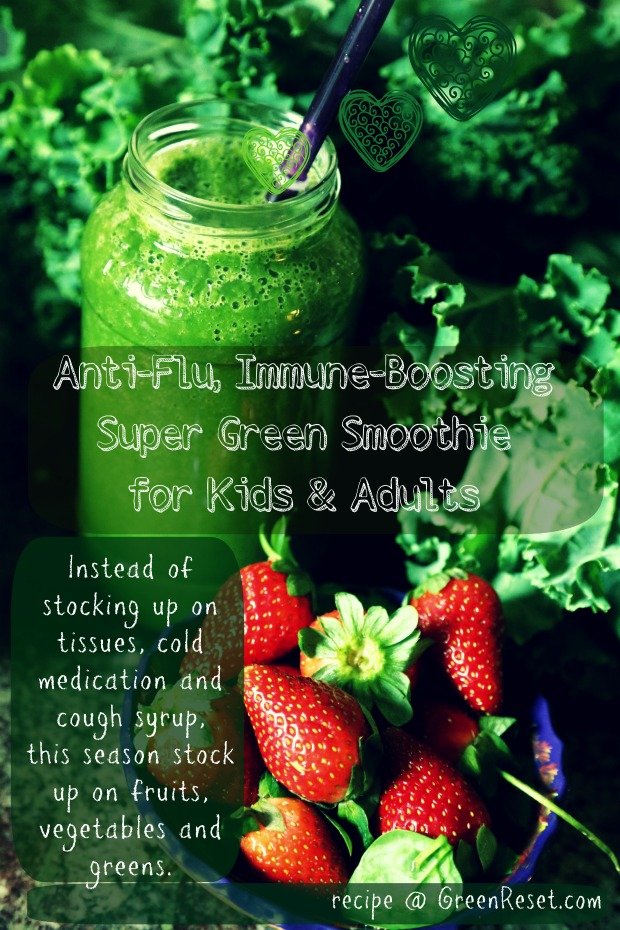
What if I told you that a simple, 15-minute habit could shift things in a big way? Not just for you, but for everyone around you — your kids, your partner, your parents, even your grandparents.
I’m talking about making a green smoothie today. Sounds almost too simple, simplistic even, right? But here’s the thing: when you take a few minutes to blend up something fresh and wholesome, it’s more than just a drink. It’s a step toward taking care of everyone in the family, one small sip at a time.
You might think, “How could something so small and insignificant make a difference?” I mean, let’s be real — we’ve all tried those massive overhauls, and they never stick.
When we try to do too much all at once–it’s EASY TO FAIL.
But a little smoothie habit? That’s doable.
And it’s the kind of thing that can satisfy and stop cravings–but in a healthy way. Perhaps it will inspire your kids to get curious about what goes into their bodies. It might encourage your partner to choose an apple over a candy bar, and maybe even spark a conversation with your parents about feeling better and living in good health to enjoy their life as they get older.
The best part? This isn’t about PERFECTION. It’s not about switching to a perfect diet or getting everyone on board right away. It’s about planting a seed. Today, it’s a smoothie. Tomorrow, maybe you’re taking a family walk after dinner. Next week, you’re all feeling a little more energized, maybe even looking forward to healthier meals together.
One small habit can set off a ripple effect. Maybe your kids start reaching for fruits instead of chips. Maybe your parents start talking about the importance of staying active and eating fresh foods. Maybe you find yourself with more energy and a clearer mind, ready to tackle all the other things on your list.
Years ago, I thought change had to be this massive, all-or-nothing thing. But here’s what I know now: it’s the small, consistent actions that really stick. And those small actions? They add up over time — not just for you, but for your entire family.
Life doesn’t need to be that hard.
In fact, the secret? Start small. So small, it might even feel silly at first.
Take green smoothies, for instance. I know, it sounds like just another wellness fad, but hear me out. It’s not about revolutionizing your diet overnight or suddenly going fully vegan. It’s about starting with one tiny, 15-minute habit that can lead to bigger changes.
You see, we’ve been wired to believe that everything needs to be massive and transformative to matter. Like, saving the world or our health needs to be this huge, monumental thing. And when it feels too big? We freeze. We do nothing. And then we kick ourselves for not doing enough.
I’m calling BS on that.
The truth is, just blending up a simple green smoothie in the morning could be the first step in something bigger. It might give you more energy for your day, brighten your mood, help you think more clearly, and even make you feel lighter — not just physically, but mentally.
Suddenly, you start exercising more because you feel like it. You might find yourself being more mindful, maybe making kinder choices for the planet, skipping animal products a little more often, and maybe even going vegan.
That’s right! I found that these weird-looking, delicious-tasting concoctions helped my body switch to eating 100% plant-based diet quickly and easily.
It’s truly mind blowing how one small habit could ripple into something powerful, something more in line with the life you’ve always imagined — one where you’re taking care of yourself, the animals, and the earth.
Years ago, I thought change had to be all or nothing. But it wasn’t until I started with something small — really small — that things began to shift. You know what happened when I made my first green smoothie? I felt good. So good that I made another one the next day, and the next, and before I knew it, I was taking better care of myself in ways that mattered. I stopped getting sick all the time. I lost weight. My skin got clearer.
And the best part was–that when I one day I decided to go fully vegan for the animals and the planet–I finally was able to do it, and I never looked back.
So, if you’re waiting for a sign, let this be it. You don’t need to overhaul everything today. You just need to blend up that first green smoothie. Take 15 minutes. That’s all it takes.
Tomorrow, do it again. And then again. And soon enough, you’ll see how these tiny habits, the ones that seem almost insignificant at first, can lead to the biggest changes.
And guess what? Your kids might notice. Your parents might ask about it. Your partner might join you. Because when you take care of yourself, you start to take care of everyone around you. And that’s how real, lasting change begins.
You’ve got this. One smoothie at a time. 💚🌱
And in case no one’s told you today, I wanted to remind you — I believe in you, and I know you’re doing an incredible job for yourself and your family.
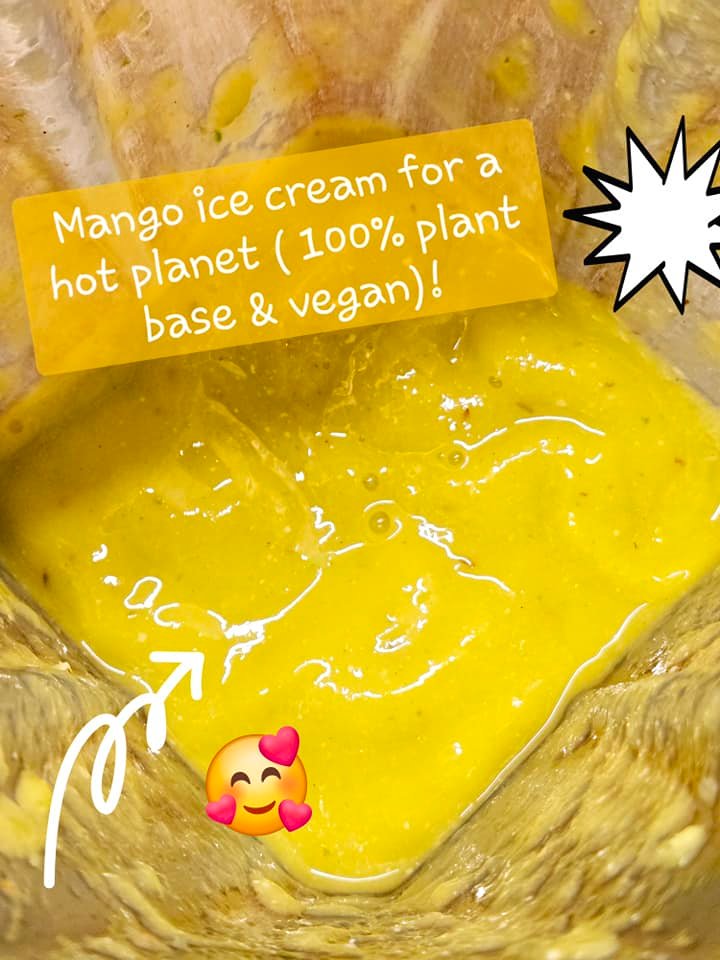
Plant-Based Mango Ice Cream: Cool Down with Compassion 🌱
When the heat outside is relentless—and this happens more often now as our planet is heating up faster than ever, we look for ways to cool down. So, why not do it in a way that’s kind to the earth, animals, and ourselves?
Enter: this 100% plant-based, super quick and easy Mango Ice Cream recipe inspired by the classic flavors of a mango lassi!
Unlike traditional ice cream, which is packed with dairy and sugar, this plant-based version is super-healthy, refreshing, and incredibly satisfying (even though it may not be as creamy and sweet).
And the best part? It’s made with just a few simple ingredients in 5 minutes tops!
Ready to dive in? Let’s get blending!
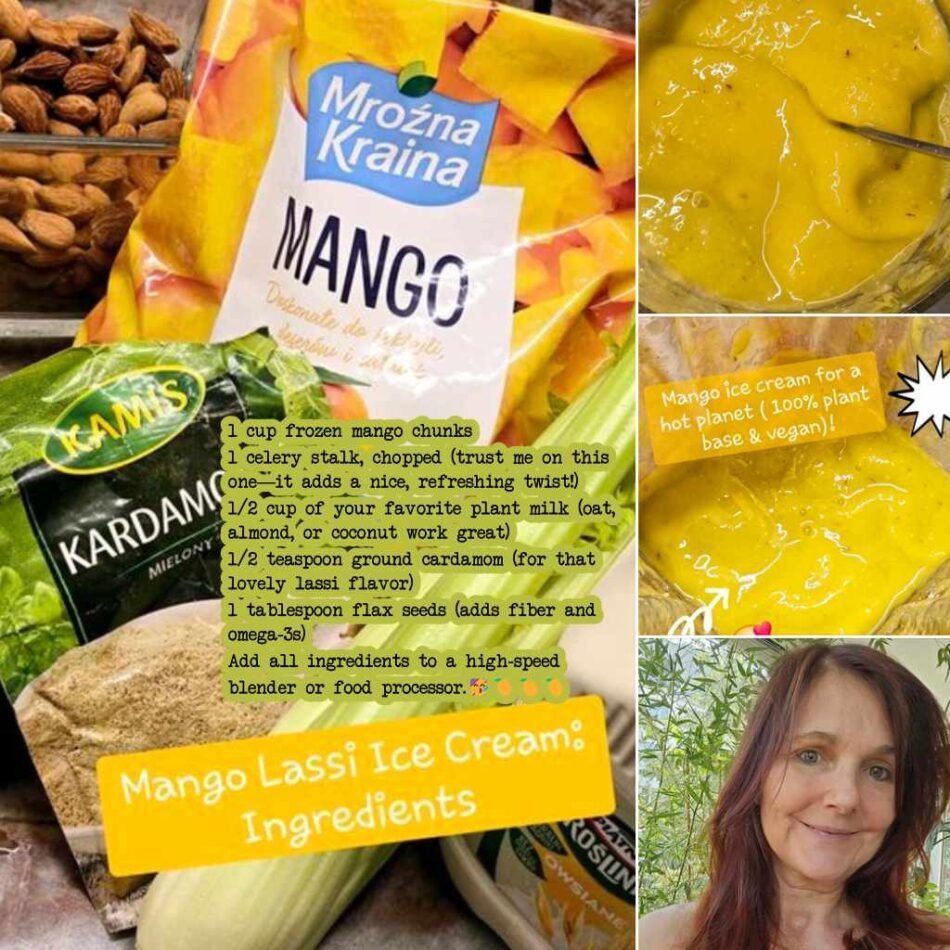
Mango Ice Cream Recipe (Vegan & Delicious)
Ingredients:
1 cup frozen mango chunks
1 celery stalk, chopped (trust me on this one—it adds a nice, refreshing twist!)
1/2 cup of your favorite plant milk (oat, almond, or coconut work great)
1/2 teaspoon ground cardamom (for that lovely lassi flavor)
1 tablespoon flax seeds (adds fiber and omega-3s)
Instructions:
Add all ingredients to a high-speed blender or food processor.
Blend until smooth and creamy, pausing to scrape down the sides as needed.
Serve immediately for a soft-serve texture or freeze for 1-2 hours if you prefer it firmer.
Calories and Nutrition: This recipe is for one portion, but feel free to double or triple it, as this plant-based mango ice cream has around 150-170 calories per serving. Compare that with your average dairy-based ice cream, which can pack in 200-300 calories and loads of added sugars. It’s a refreshing alternative with wholesome ingredients, fiber, and natural sweetness.
Does it Taste Like “Real” Ice Cream? Many people would say that not exactly—or not at all!—but that actually a GOOD thing. Traditional ice cream is made with dairy, sugar, and other stuff, ingredients that are often unhealthy, cruel, environmentally damaging, and nutritionally empty. Dairy, in particular, is unnecessary for humans, harms animals, and contributes significantly to greenhouse gas emissions. Seriously–we’re raising and killing billions of cow mothers and their babies—just to have a drink that is meant for infants for another species. It’s insane!
The Truth About Dairy: The dairy industry is not just harmful to animals; it’s also terrible to our planet. It’s wasteful, water-intensive, and completely unnecessary. No human needs to drink the milk meant for calves—it’s time we let go of this outdated practice. Not your mom, not your milk!
So, what does “real” mean anyway? Real, to me, means kind, sustainable, and delicious. And this Mango (N)Ice Cream is all that—and so much more.
“Got Milk?” Not Always: How Colonialism Brought Cow’s Milk to India
Speaking of mango lassi—you’d think dairy was always a big deal in India, right? After all, India’s got a rich vegetarian tradition and sacred cows roaming the streets. But here’s the twist: cow’s milk wasn’t always so popular. In fact, it was the British who really pushed it during colonial times, reshaping diets and food culture in ways that still affect us today.
Before the British showed up, many Indians thrived on plant-based diets filled with legumes, grains, veggies, and fruits. Sure, some dairy like ghee and yogurt had their place, mostly in religious rituals and among wealthier folks, but everyday cow’s milk? Not as big as you’d think. The traditional plant-based approach was not just healthy but also aligned with Ayurvedic wisdom, emphasizing balance, sustainability, and respect for all living beings.
Then the British came along with their love of cow’s milk and a whole lot of colonial zeal. They pushed dairy hard, setting up farms, importing European cattle, and promoting milk as a symbol of health and modernity. But there was a catch—they ignored the fact that a huge chunk of the Indian population is lactose intolerant. And they didn’t really care about the centuries-old plant-based diets that were already doing just fine without milk.
Milk Myths vs. Plant Power
The British sold milk as a miracle food, but modern research paints a different picture. Milk can be tough on the digestive systems of many Indians and is linked to health issues like heart disease and certain cancers. Meanwhile, plant-based diets, loaded with fiber, antioxidants, and all the good stuff, help protect against chronic diseases. And let’s bust that old myth: you don’t need milk for calcium—leafy greens, nuts, seeds, and fortified plant milks got you covered without the downsides.
The Not-So-Green Dairy Scene
Let’s talk environment. Dairy farming isn’t just tough on our bodies; it’s rough on the planet too. Cows produce methane—a potent greenhouse gas that fuels climate change. Plus, dairy farming guzzles water and contributes to land degradation, deforestation, and pollution. By contrast, plant-based agriculture is generally more efficient, using less land, water, and energy. It’s better for the planet, plain and simple.
Reclaiming Plant-Based Roots
The colonial push for milk reshaped Indian diets, sidelining sustainable plant-based traditions that had worked for centuries. Today, more people are waking up to the benefits of going back to those roots—embracing plant-based eating for better health, a happier planet, and a little cultural redemption too.
So, next time you sip on a dairy-free mango lassi, remember: it’s not just a tasty choice; it’s a nod to a rich, plant-based heritage that predates the colonial milk makeover. Going plant-based isn’t just about what’s good for you—it’s about reclaiming what’s always been good for India.
Looking for More Plant-Based Treats? Check Out These Delicious Vegan Ice Cream Recipes:
Up to 87% greenhouse gas emissions may come from this one sector!
87%?!
You may think this is a bunch of nonsense, but please keep reading.
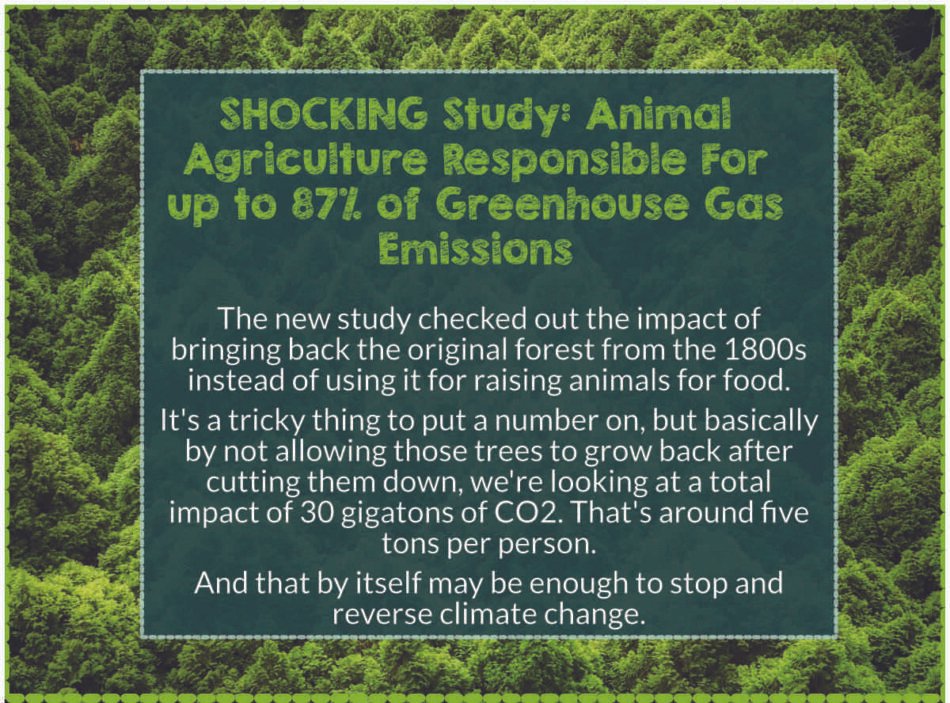
According to a study by Dr. Sailesh Rao: Animal Agriculture Responsible For up to 87% of Greenhouse Gas Emissions
In the past, there have been different estimates, one from the UNFAO at 18%, and then another from Goodland and Anhang at 51%. UNFAO reinterpreted their work and made it 14.5%.
And now, Dr. Sailesh Rao suggested this outrageous number of 87%.
Where did that come from?!
Why are these estimates so wildly different?
The UNs 2006, 18% figure and the World Watch Institutes 2009, 51% figure, are different because the latter accounted for the breathing contribution of animals and photosynthetic capacity of the land used for feeding and housing livestock.
Plus, they’d also used a 20-year time frame for calculating methane emissions, instead of 100. And both were controversial in some circles, especially in the animal industry.
But there is another factor that was missing from these reports.
And that is the opportunity cost of the land use.
It’s a tricky thing to put a number on, but the new study checked out the impact of bringing back the original forest from the 1800s instead of using it for raising animals for food.
Basically by not allowing those trees to grow back after cutting them down, we’re looking at a total impact of 30 gigatons of CO2. That’s around five tons per person.
And it turns out that by itself would be enough to reverse climate change.
The opportunity cost of forests in determining accurate greenhouse gas emissions turns out to be such an enormous factor.
Which is BAD news.
But it’s also GREAT news!
Because that is something that we can change.
If we got rid of animal-based products, replaced them with plant-based alternatives, and changed how we’re using the land, restoring the forests, wetlands, mangroves, and leaving the oceans alone, we might have a shot NOT JUST AT SLOWING DOWN the climate change, loss of biodiversity, water and soil depletion, ocean acidification, and such…
BUT we even may have a chance of REVERSING some of the damage.
But the clock is ticking.
Either we switch to a plant-based food system, or the world as we know it ends.
It may not end tomorrow or after tomorrow, but if the trends continue, that time will come.
Sorry for being so blunt, but such are the facts.
And whatever that number really is, it doesn’t even matter.
Whatever estimates you accept as the closest to the truth—the bottom line is that impact is HUGE, and we can’t ignore it any longer.
Even if it’s half or one third or a quarter, we need to stop pretending it’s not a big deal.
Our planet has finite resources and that our current lifestyles are unsustainable.
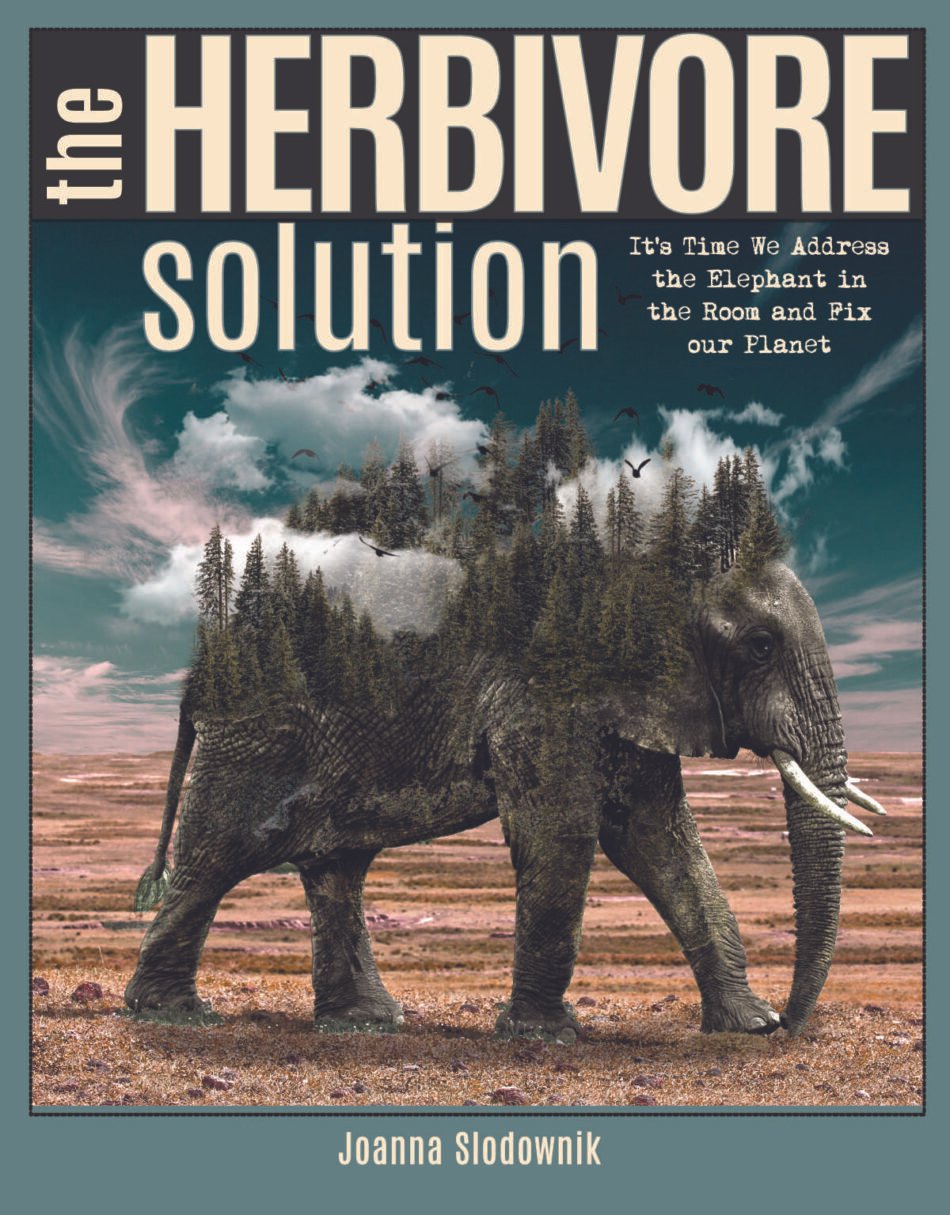
We have to address this enormous elephant in our kitchen.
We cannot keep looking at that elephant and pretend he’s a pony.
We need to take action to reduce our carbon footprint and adopt more sustainable practices to ensure a better future for ourselves and future generations.
And if you are not an herbivore yet, how about becoming one today?
On any acre of land, we can grow TWELVE TO TWENTY times the amount in pounds of vegetables, fruits, and grains as in pounds of edible animal products!
But it’s not just about what’s on your plate.
It’s about making others aware, and especially making the politicians and decision makers aware.
So, share this information with as many people as you can, and demand action from those who are in power.
Let’s start the REVOLUTION.
Because if not us, then who. If not now, then when.
PS. Sign up for my newsletter if you want to receive more articles from my new book “The Herbivore Solution”.
You may already know a few things about me. Namely, that I’m an author, blogger, green smoothie enthusiast, vegan, and maybe a few other weird things.
But here is the thing…
I know nothing about you, except that for some strange cosmic reason, you ended up on one of my pages, reading one of my books or articles, and signing up for my list, entrusting me with your email address and attention.
And your attention, even if for a just few seconds, is priceless.
Because you’ll never get those few seconds or minutes (or hours, if you read one of my books!) back.
So, I would like to know—why did you do it?
Did you have a reason, or it was an impulse?
And what did you expect?
Are you a plant-curious omnivore? Vegetarian? Vegan?
Do you want recipes? Advice? Inspiration?
Information? Education? Entertainment?
Of what kind?
Now, I can’t promise you that I’ll deliver whatever you ask me to, but I can perhaps try.
BTW, I’ll tell you more about what I’m planning to write about in the near future. Some of things may already be familiar to you, some things may be new, struck you as strange, or even weird.
So, if you feel like you’d like to share with me a little bit about yourself, then you share your thoughts below or on my Facebook, Instagram, or via email.
Because I’ll just keep writing and trying to figure out my role in the big scheme of things in the universe.
P.S. Do you ever ask yourself these questions? “Who am I? Why am I here?” It’s worth asking yourself these questions repeatedly, again and again, because the answers you’ll get may surprise you.
PS. If you are not an herbivore yet, how about becoming one today?
A study published in the journal Nature found that if more people switched to plant-based diets, we could reduce greenhouse gas emissions by up to 70%, reduce pollution, and free up the land the size of Brazil to plant forests and restore natural habitats — and that’s huge!
On any acre of land, we can grow TWELVE TO TWENTY times the amount in pounds of vegetables, fruits, and grains as in pounds of edible animal products!
But it’s not just about what’s on your plate.
It’s about making others aware, and especially making the politicians and decision makers aware.
So, share this information with as many people as you can, and demand action from those who are in power.
Let’s start the REVOLUTION.
(More on this coming soon…)
Because if not us, then who. If not now, then when.
Here’s a little secret: you don’t need caffeine to start your day!
Or at least, not exclusively, LOL.
For a long time I’ve been looking for a delicious and nutritious alternative to my morning second coffee. (For some reason, I always need two).
I wanted to drink less caffeine, but couldn’t find anything that would be energizing and satisfying enough to warrant the break of fast. (I had been doing intermittent fasting for a while, and even though I stopped now, I am still only drinking black coffee or tea, no milk no sugar, in the morning till late breakfast or lunch).
However, I’ve noticed that after a lot of black tea and coffee on an empty stomach, my belly was not happy, so I decided to try something different.
And this warm maca cocoa drink fit the bill perfectly. It tastes so good! Packed with the goodness of maca powder, cocoa, flax seeds, and plant-based milk, it provides me with a natural energy boost to kick start my day, satisfies my senses, and gives me some serious nutrition for my brain (yay!).
But, Joanna, is it really better than a smoothie in the morning? You may ask.
Well, it depends what you’re in the mood for. Sometimes a girl just wants something warm (and maybe it’s a sign that the fall is coming).
And if you have a milk frother, then it will be even more amazing, I promise.
I have to say, flax seeds make this drink very filling and satisfying, so definitely try it. Alternatively, if you don’t have flax, you can experiment with adding chia seeds. The consistency will be different, but the texture can be even more exciting, IMHO 🙂
So, here is the recipe.
Recipe: Energizing Maca Cocoa Morning Drink
Ingredients:
1 cup of unsweetened plant-based milk (almond, soy, oat, or your preference)
1-2 teaspoons of your favorite natural sweetener (such as maple syrup, agave nectar, or honey for non-vegan option)
A pinch of sea salt (optional)
A dash of vanilla extract (optional)
Method:
1) Pour your plant-based milk into a small saucepan and heat it over medium-low heat. Be careful not to bring it to a boil; you want it hot but not scalding.
2) While the milk is heating, combine the maca powder, cocoa powder, ground flax seeds.
3) Once the milk is hot, slowly whisk in the dry mixture. Keep stirring gently to prevent lumps from forming.
4) Flavor it Up (Optional): For an extra layer of flavor, you can add a dash of vanilla extract or a pinch of cane sugar or maple syrup.
5) Simmer and Serve: Allow the mixture to simmer for a few minutes, stirring occasionally. This will not only infuse the flavors but also help thicken the drink slightly due to the flax seeds. Give it a taste and adjust the sweetness or cocoa flavor if necessary.Once everything is well combined, pour your warm maca cocoa morning drink into your favorite mug.
Garnish (Optional): You can garnish it with a sprinkle of cocoa powder or a dash of cinnamon for an extra touch of flavor and visual appeal.
Sip Slowly: It’s hot! Take your time savoring this delightful, energizing drink. Enjoy the subtle nutty notes from the flax seeds and the earthy richness of maca and cocoa.
Now, you have a wholesome and invigorating morning drink that’s caffeine-free, vegan-friendly, and brimming with nutrients. It’s the perfect way to wake up your body and mind without the jitters of coffee. Cheers to a healthier morning routine!
And if you worry about buying exotic ingredients from far away places, I respect that. I try to do that, too, most of the time.
If that’s you, try to come up with a combination that is from ingredients that grow locally, where you live. For me, it would be flax seeds, oat milk, kale powder, and hemp seeds, for example, which is a combination that I might try as well.
However, you should also know that any plant food is much better for the planet than any animal-based food, no matter how it was produced and transported.
So, should you give maca a try?
According to numerous internet sources, maca, the star ingredient in this recipe, has many health benefits.
Energy and Stamina: Maca is known for boosting energy levels and endurance, making it a natural energizer.
Hormone Balance: It can help regulate hormones, especially in women, alleviating symptoms of menopause and PMS.
Mood Enhancement: Maca may improve mood and reduce symptoms of depression, thanks to its adaptogenic properties.
Nutrient-Rich: Maca is a good source of vitamins, minerals, and antioxidants, supporting overall health.
Bone Health: Some studies suggest it may enhance bone density and reduce the risk of osteoporosis.
Adaptogenic: It may help the body adapt to stress and maintain balance in various bodily functions.
All of these sound great to me. AND it tastes great!
It’s important to keep in mind that individual responses to maca can vary, and it’s always best to consult with a healthcare professional before adding it to your diet, especially if you have any underlying health conditions.
Sip on our warm maca cocoa morning drink and cheers to a healthier morning routine!
Remember that individual responses to maca can vary, and it’s essential to consult with a healthcare professional before adding it to your diet, especially if you have any underlying health conditions.
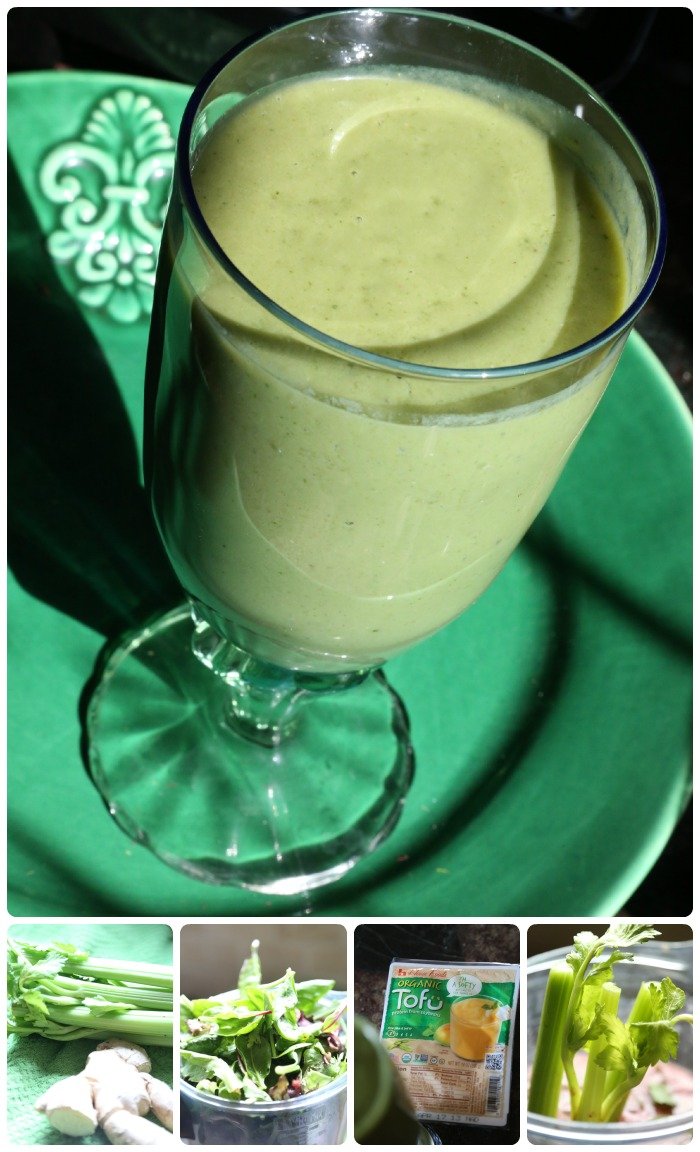
Today I want to share with you a delicious recipe for a veggie-tofu scramble with one special secret ingredient, called kala namak. (And if you’re not familiar with kala namak, I have to warn you that the first time you try it will amaze or disgust you!) It’s a perfect follow-up to a green smoothie on a lazy Sunday morning.
(Side note: I used to have a smoothie first thing in the morning, and then about 11-12AM I was ready for another smoothie, or something more substantial. Today my routine has changed, and I don’t make smoothies as often. I often fast the whole morning, drinking only coffee or water, and then go straight to lunch.)
The recipe below is a perfect breakfast/brunch or even lunch/dinner dish – it’s healthy, low-fat, and cholesterol-free. It takes about 20 minutes to prepare, or less, if you do some prepping, like chopping your veggies in advance.
But first a picture of my smoothie….(yum…)
(You can even put a some tofu into a smoothie, as I did here, to make it more filling. :-))
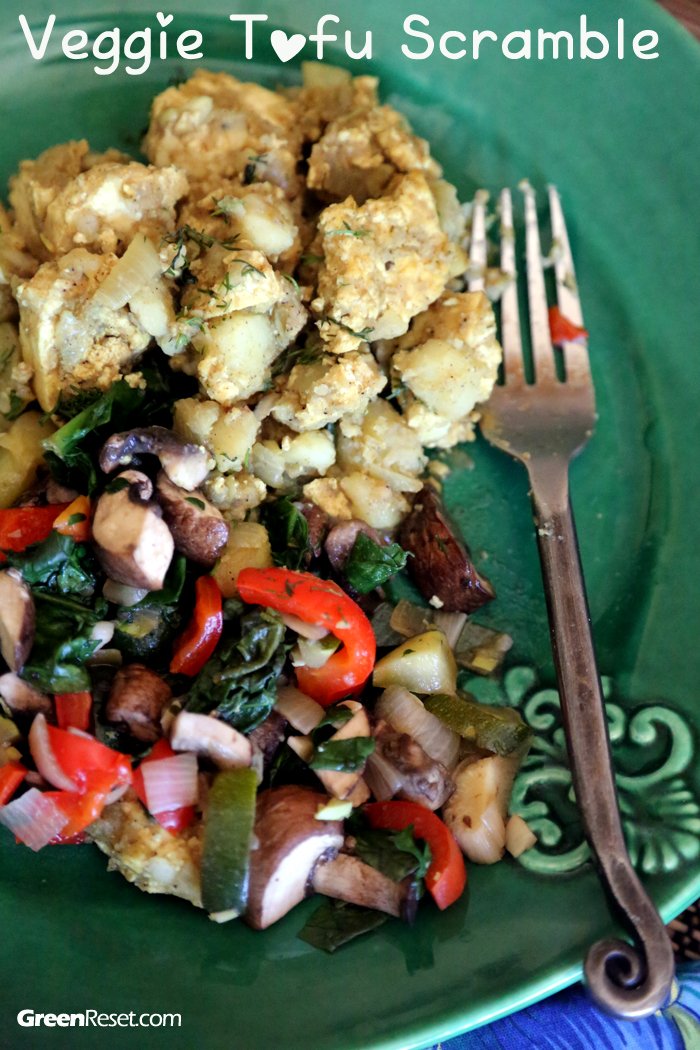
Veggie Scramble Recipe (with Tofu)
If you don’t love tofu, you are certainly not alone. For me, it wasn’t the love at first bite, if you know what I mean ;-). However, as I experimented more and more, I learned to absolutely love it. Now I cannot imagine my life without tofu and I use it often, at least a couple of times per week.
If you’re new to tofu, it’s worth to try different brands and types, and experiment with recipes. For example, the silky tofu is just to die for in deserts (such as this chocolate mousse), while the super firm one will do great in veggie-tofu scramble or stir-fried in slices in sesame oil with some soy sauce and maple syrup.
Part of the success of the tofu scramble may be in the recipe. When I first tried tofu scramble, I used Isa Moscowitz’ recipe from the “Vegan Brunch” book, and the dish turned out perfectly.
If you think of tofu scramble as a bland, boring dish, that’s a sad substitute for an egg-scramble; you’ll be pleasantly surprised. Isa’s tofu scramble is by no means bland, bursting with flavor and aroma. You won’t miss eggs, I promise! (Unless you are a die-hard meat-and-dairy eater like my husband, that is, but even he’s gotten used to the scramble and now loves it just as I do).
The Secret Ingredient for Egg-Free, but Just-Like-Eggs Dishes
Over time, I modified the recipe to suit my taste and the contents of my pantry. One major modification has been adding a big pinch or two of kala namak. It’s an ingredient that makes all the difference in recipes that traditionally used eggs, such as egg salads, mayo, etc.
Kala Namak or Himalayan black salt, sanchal, kala loon or black lava salt is an ingredient you absolutely must have in your kitchen! It adds an AMAZING EGG FLAVOR to otherwise all plant-based, egg-free, cholesterol-free, cruelty-free recipes, such as no-egg salad, tofu no-egg scramble, egg-free mayo, and many others.
If you’ve never tasted it you’ll be SHOCKED just as I was when I tried it for the first time (I swear my eyes got as big as the saucer in which I mixed my first no-egg salad). I was expecting an okay taste and was absolutely blown away at how similar to chicken eggs it smelled and tasted. It was so very strange and cool!
Turns out that chicken eggs’ taste has nothing to do with the chicken, but everything to do with the Sulphur content of the egg. And it’s the Sulphur compounds in the black salt (which is actually pink in color) make the salt taste and smell JUST LIKE CHICKEN EGGS.
(Note: Those who are not accustomed to black salt often describe the smell as similar to rotten eggs. Some people find the smell offensive, just like the smell of slightly rotten eggs, in fact, for some reason my egg-loving family consider the smell of the salt by itself repulsive, but don’t worry, once the black salt is mixed with other ingredients of the dish they love it. So don’t worry, even if you find the smell questionable, once it’s incorporated into the recipe—it’s much more subtle, deepening the flavor of the whole dish.)
2 Tbsp olive oil (optional, I like to simply sautee in a little bit of water, but maybe if you want to really brown the tofu, you can use some olive oil)
3 garlic cloves, minced (I used more, just because I like it)
1 onion, chopped
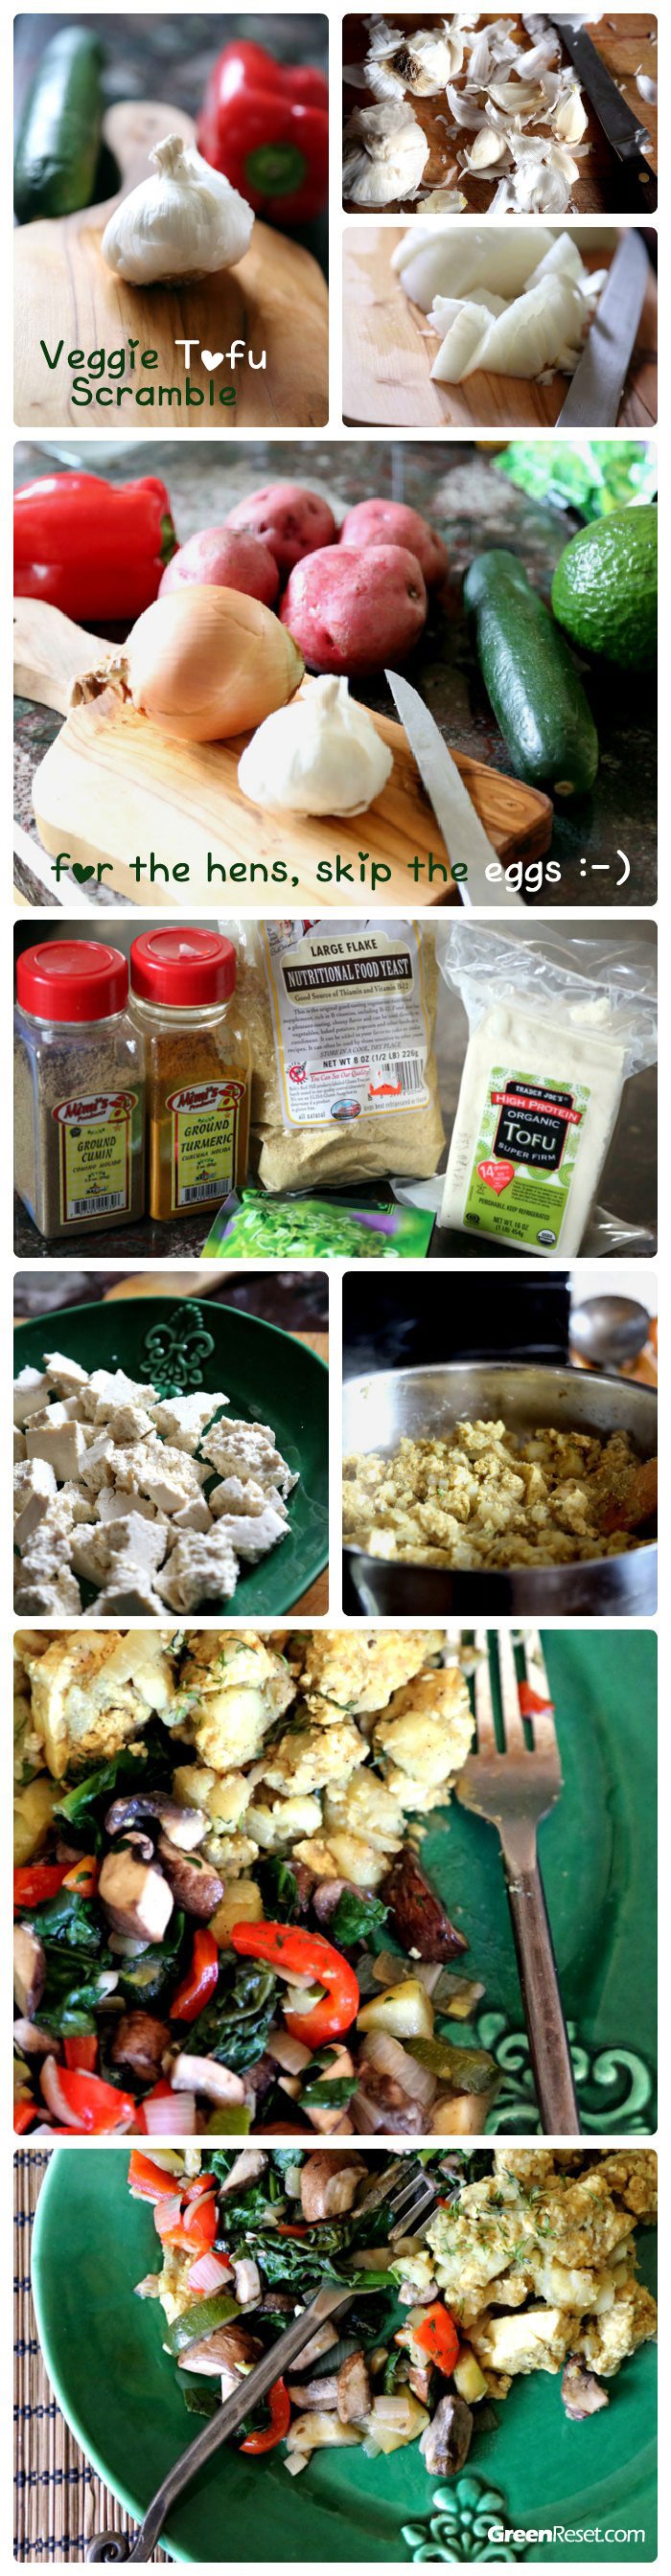
1 lb firm or extra firm tofu, crumbled
1/4 cup nutritional yeast (optional)
1 slice of vegan cheese, use the one that melts well (optional)
Fresh black pepper to taste
Instructions
Mix the spices (cumin, thyme and turmeric and salt) together with the water in a small cup.
Preheat a large, heavy-bottomed pan over medium-high heat.
Sauté the garlic in olive oil for about a minute.
Break the tofu apart into bite-size pieces and sauté with the garlic for about 10 minutes, stirring often.
Get under the tofu when you are stirring, scrape the bottom, and don’t let it stick to the pan, using a spatula to get the job done.
The tofu should slightly brown on at least one side.
The water should cook out of it and not collect too much at the bottom of the pan. If that is happening, turn the heat up and let the water evaporate. Conversely, if the scramble seems dry add splashes of water until it’s nice and moist.
Add the spice blend and mix to incorporate. Add the nutritional yeast, vegan cheese, and pepper. Cook for about 5 more minutes. Serve immediately.
Notes
Total Prep And Cook Time: 20 Minutes
Serves 4 - 6
Nutrition Data Per 117g Serving: 107 cal, 3g carb, 7g fat, 251mg sodium, 1g fiber, 11g protein, low Cholesterol, good source Calcium, Iron, Magnesium, Phosphorus, Copper, Selenium and Manganese.
You can include these additions to your scramble by themselves or in combination with one another:
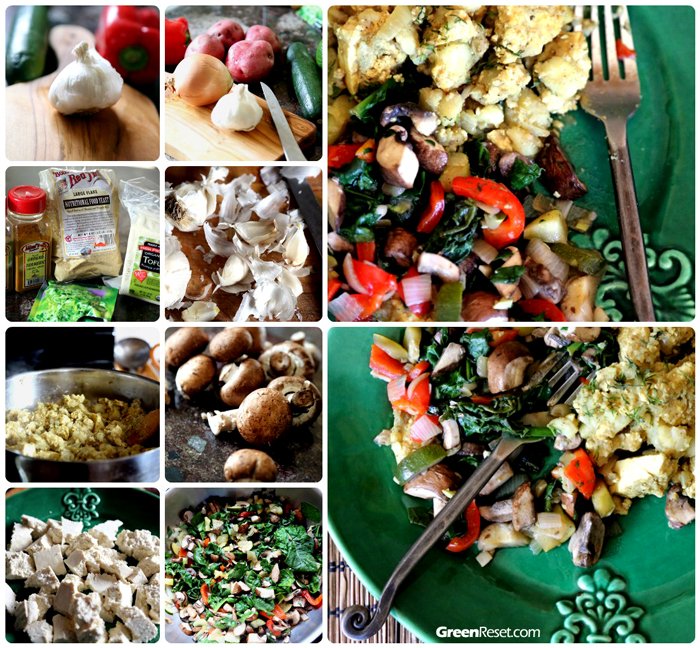
Potatoes: Cook 1-2 potatoes, cubed, in water until almost tender. Strain and add to tofu to brown on the skillet.
Mushrooms: Chop the mushrooms and add to tofu.
Onions: Chop 1 small onion. Add along with the garlic and cook for about 5 minutes, until translucent. Proceed with recipe.
Red Bell Peppers: Remove stem and seeds and finely chop 1 red bell pepper. Add along with the garlic and cook for about 5 minutes. Proceed with recipe.
Another great ingredient to add is vegan cheese. Choose one that melts well, it will add wonderful cheesiness to the scramble.
I wanted to make a scramble with potatoes, so I cooked 2 small potatoes, cubed, and added them to the tofu to brown with the spices. I also had wanted to make a veggie scramble separate from the tofu (I wanted to add A LOT of veggies), so I sauteed them in a separate pan. I used some garlic, onion, mushrooms, zucchini, red pepper and spinach. I didn’t use the same spices as for the scramble. I only added a bit of tamari sauce and pepper. I served it together with tofu.
It was a delicious and very satisfying brunch!
This scramble recipe is really filly and versatile. Try it for brunch, lunch or casual dinner; on Saturday or Sunday. (Or any other day, really :-)).
4 Tips For Tofu Scramble Success
Here are some more tips on how to make tasty tofu scrambles:
1. To make the best tofu scramble, choose extra firm tofu.
2. Some people like to press their tofu before using it in recipes. (Personally, I never do that, but you may want to try.) To make the scramble, remove tofu from the package and wrap it in a paper towel. Then, wrap it in a dish cloth. Place wrapped tofu between two cutting boards with a few heavy books on top. Press for about 15 minutes. You’ll notice the water draining out of the tofu.
3. Crumble the tofu into a bowl; toss with spices (ground turmeric will give your scramble a golden hue), nutritional yeast, and a few dashes of tamari or soy sauce. Mix until well-coated. Let mixture sit for 10 minutes while you prep the veggies.
4. Saute the veggies in a touch of oil or veggie broth until just tender. Set aside. In the same skillet, brown tofu, then fold in the veggies. I like zucchini and fresh corn in the summer; mushrooms, bell pepper, and broccoli anytime of year; and sun-dried tomatoes, collard greens, and pesto in the fall. (For more tips, see this article in Vegetarian Times).